25 Outdoor Merry Christmas Sign Builds Anyone Can Do

A handcrafted holiday sign on your front lawn or porch conveys heartfelt warmth that commercial store-bought decorations simply cannot match. Greeting visitors with bold, bespoke holiday lettering sets a gracious, festive tone.
Building your own outdoor holiday sign is surprisingly accessible, requiring only basic tools, salvaged materials, and smart weatherproofing techniques. From glowing marquee letters to repurposed vintage shutters, these 25 DIY builds elevate your curb appeal.
Key Takeaways
- Spar urethane blocks rot.
- C7 bulbs create marquees.
- Sand ballast weights frames.
- Carbon paper aids lettering.
Outdoor Merry Christmas Sign Builds
Handcrafting outdoor signage allows you to tailor scale, typography, and color palettes to match your home’s exact exterior architecture. Utilizing reclaimed pallet planks, salvaged shutters, and cedar boards adds authentic soul.
Sealing vulnerable timber end grain, selecting flexible exterior enamel paints, and anchoring signs against winter winds ensures your handmade creations remain beautiful across many holiday seasons.
1. Plywood Marquee Bulbs

- Half-inch exterior plywood sheet
- Drilled socket holes for warm C7 bulbs
- Stenciled vintage circus letter style
The Look and Technique:
Drilling socket holes into giant plywood letters to insert glowing bulbs crafts an authentic, showstopping Broadway marquee sign.
Best Suited For:
Front lawns, garage peaks, and porch balustrades.
Pro Stylist Tip:
Prime plywood edges with exterior oil primer before painting to prevent edge swelling in rain.
2. Cabinet Door Upcycle

- Salvaged raised-panel cabinet door
- Chalk-painted festive lettering
- Attached faux evergreen and berry swag
The Look and Technique:
Transforming discarded kitchen cabinet doors into framed holiday signs brings charming rustic upcycled beauty to front porches.
Best Suited For:
Beside front doors and hanging on porch railings.
Pro Stylist Tip:
Seal chalk paint with exterior clear satin spar varnish to protect lettering from damp weather.
3. PVC Outline Frame
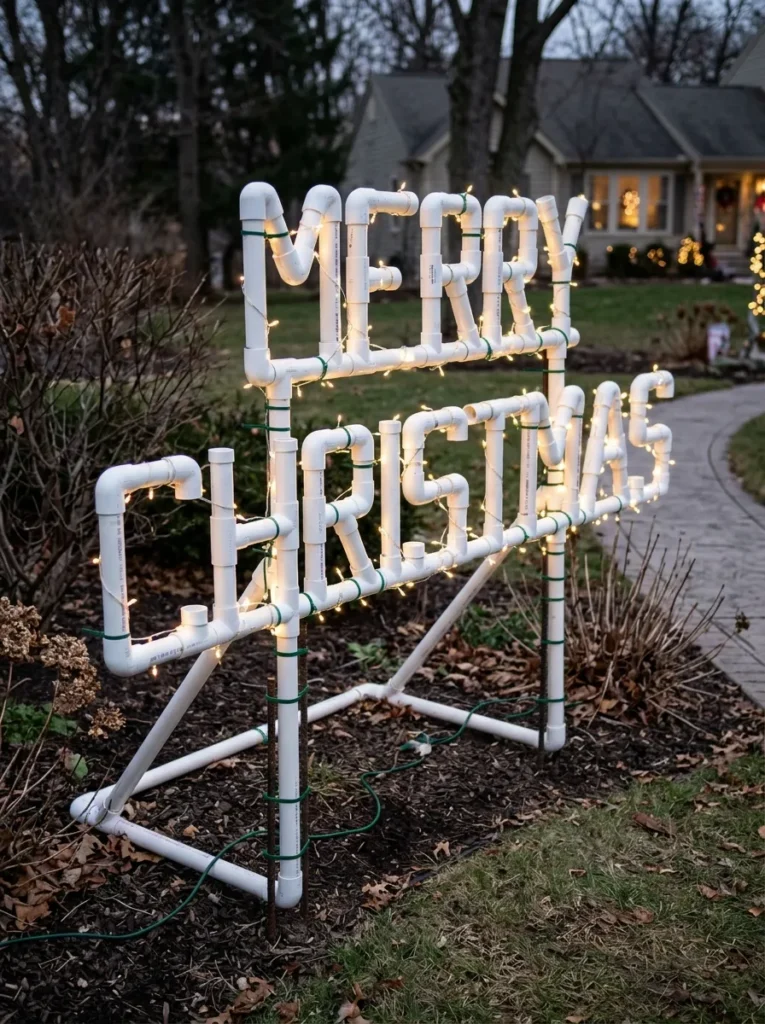
- One-inch furniture-grade PVC piping
- Elbow fittings forming letter borders
- Wrapped red and white spiral tape
The Look and Technique:
Assembling PVC pipes into giant freestanding holiday letter frames creates an indestructible, lightweight lawn sign.
Best Suited For:
Front lawn clearings and driveway borders.
Pro Stylist Tip:
Fill bottom PVC pipes with dry play sand to give lightweight frames stable wind ballast.
4. Rope Light Script

- Flexible 120V exterior silicone rope light
- Bent copper wire cursive script frame
- Zip-tied illuminated typography
The Look and Technique:
Bending silicone rope lights along bent wire frames spells out elegant glowing cursive greetings across porch railings.
Best Suited For:
Front porch railings and exterior house walls.
Pro Stylist Tip:
Bend heavy wire coat hangers into script templates before zip-tying rope lights onto frames.
5. Pallet Board Sign
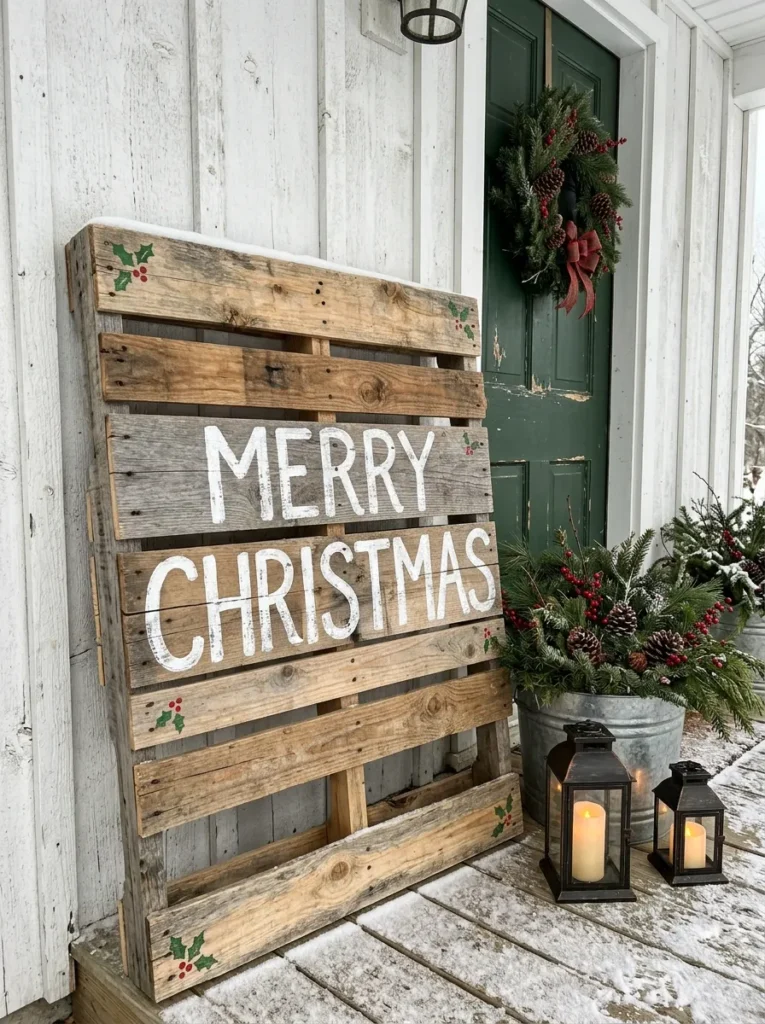
- Weathered reclaimed pallet slats
- Stenciled distressed white lettering
- Tucked burlap and pinecone accent corner
The Look and Technique:
Assembling weathered pallet planks into a rustic wooden sign adds cozy farmhouse warmth to front entryway steps.
Best Suited For:
Front porch stoops and entryway corners.
Pro Stylist Tip:
Sand raw pallet boards smoothly before stenciling to ensure paint lines remain crisp.
6. Chalkboard Canvas Battery
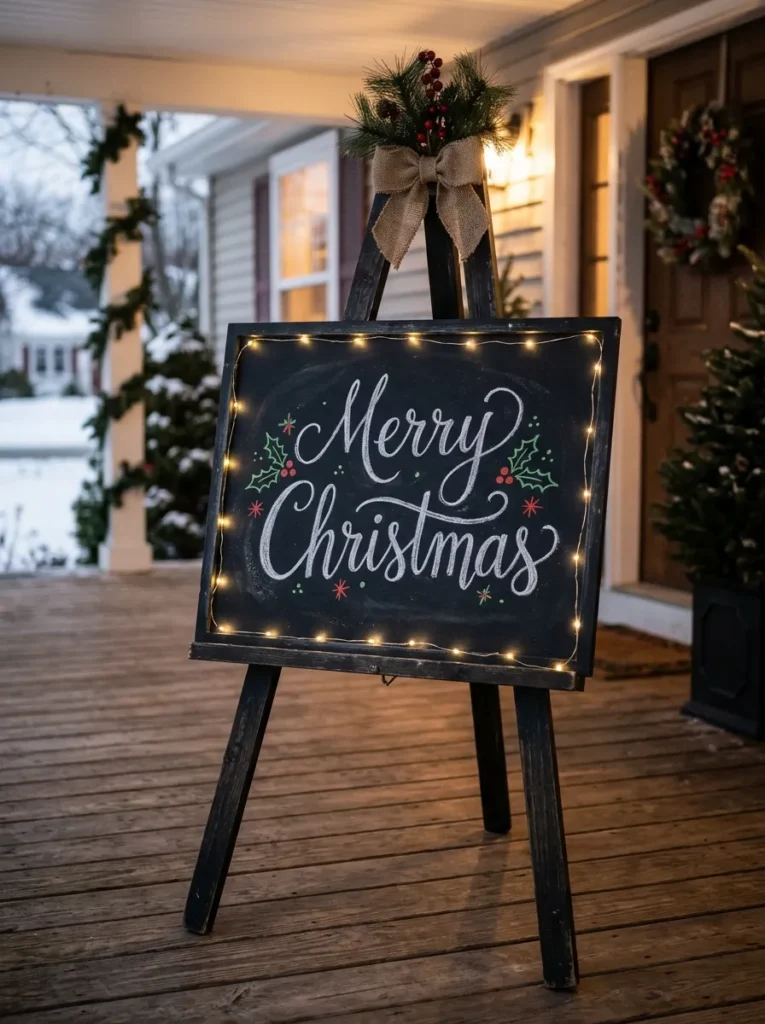
- Exterior weatherized chalkboard panel
- Hand-lettered seasonal typography
- Pre-strung warm battery micro LEDs
The Look and Technique:
Framing a weather-resistant chalkboard lit by battery micro fairy lights lets you update holiday greetings throughout December.
Best Suited For:
Covered porch consoles and entryway walls.
Pro Stylist Tip:
Use dust-free liquid chalk markers that resist smudging when exposed to outdoor humidity.
7. Metal Stake Base
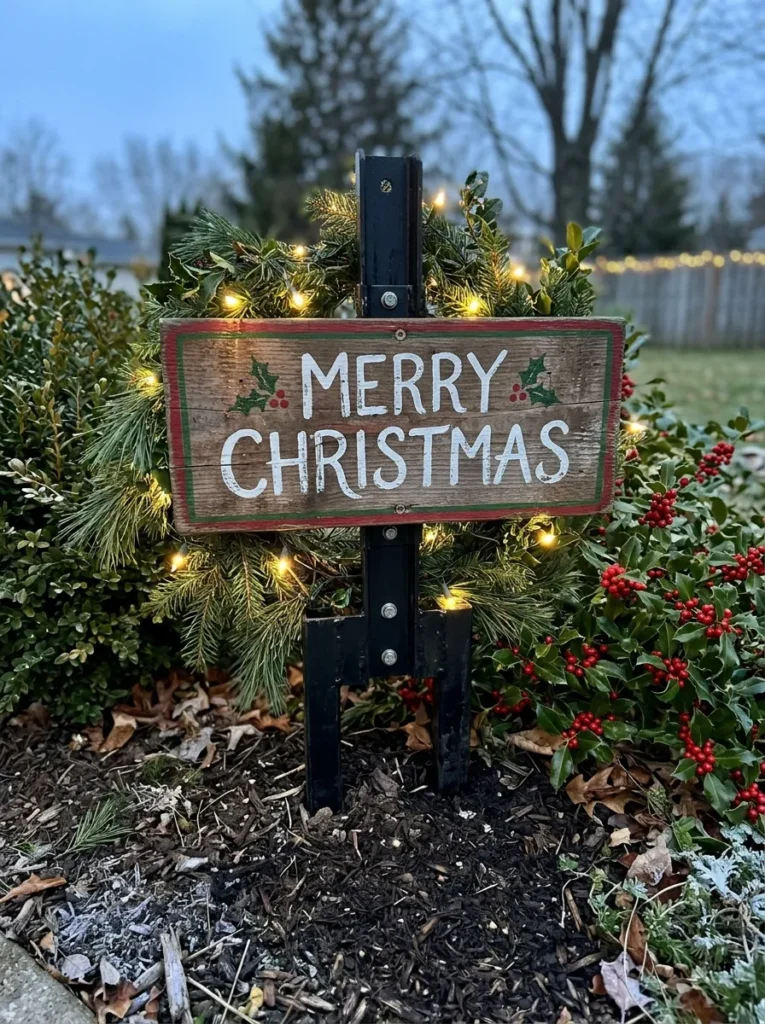
- Heavy laser-cut Corten steel letters
- Integrated soil ground stake blades
- Warm natural weathered rust patina
The Look and Technique:
Planting weathered steel holiday letters directly into garden mulch adds timeless, understated architectural folk art to lawns.
Best Suited For:
Front flowerbeds and shrubbery foundations.
Pro Stylist Tip:
Push steel stakes firmly into garden soil until bases rest flush to keep silhouettes straight.
8. Stencil Painted Letters

- Heavy cedar plank backer board
- Laser-cut holiday font stencils
- High-contrast exterior acrylic paint
The Look and Technique:
Using precision font stencils on cedar boards ensures crisp, professional lettering that looks custom-built.
Best Suited For:
Beside front doors and hanging on railings.
Pro Stylist Tip:
Use a dry stencil brush with a dabbing motion to prevent paint bleeding under stencil edges.
9. Drill Hole Minis

- Painted wooden panel with drilled holes
- Pushed-through mini light bulb diodes
- Rear-wired holiday message glow
The Look and Technique:
Pushing mini light bulbs through drilled holes in painted boards spells out glowing holiday words that shine brightly at night.
Best Suited For:
Exterior garage walls and porch railings.
Pro Stylist Tip:
Use drill bits matching light bulb diameters exactly so sockets fit snugly without slipping.
10. Sealed Polyurethane Finish
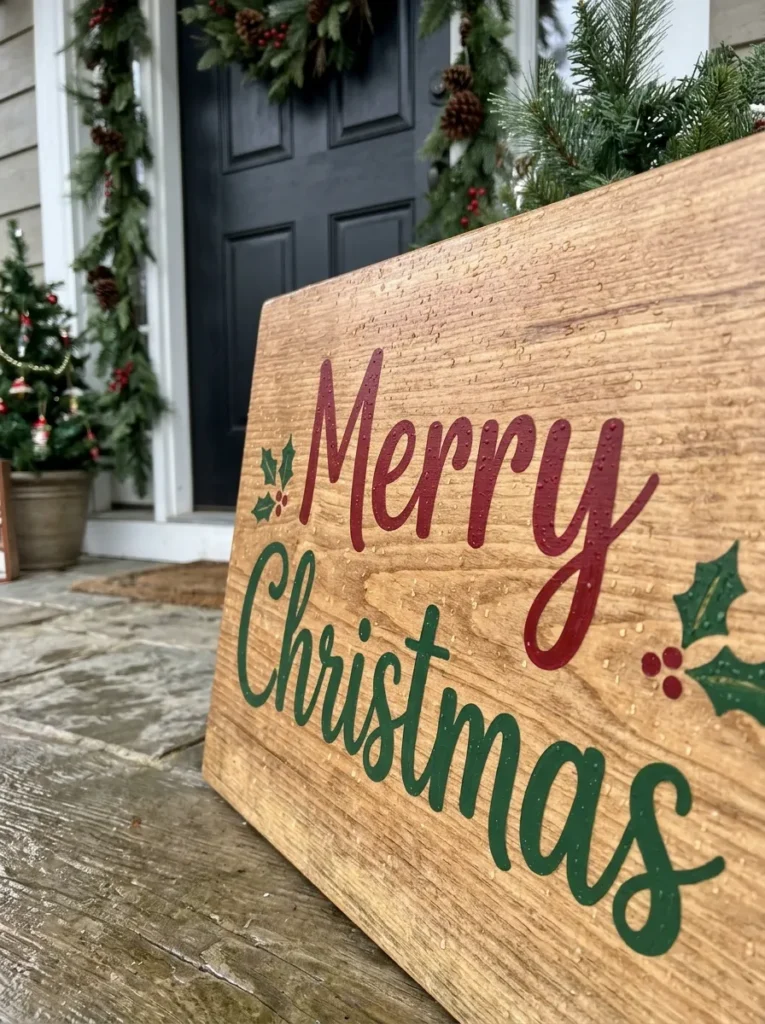
- Three coats of exterior marine spar urethane
- UV-blocking clear protective shield
- Blocks winter rain, ice, and snow
The Look and Technique:
Applying premium spar urethane over painted wooden signs guarantees your handcrafted holiday art endures decades of winter storms.
Best Suited For:
All handcrafted wooden exterior holiday signs.
Pro Stylist Tip:
Sand lightly with 320-grit sandpaper between coats for an ultra-smooth, professional finish.
11. Galvanized Tin Alphabet

- Dimensional stamped galvanized metal letters
- Mounted atop weathered reclaimed timber
- Modern industrial farmhouse style
The Look and Technique:
Fastening galvanized metal letters onto rustic timber creates a striking blend of industrial metal and warm weathered wood.
Best Suited For:
Front porch entries and rustic cabin verandas.
Pro Stylist Tip:
Fasten tin letters to wood with exterior brass screws for attractive, rustproof hardware contrast.
12. Tree Shaped Plaque
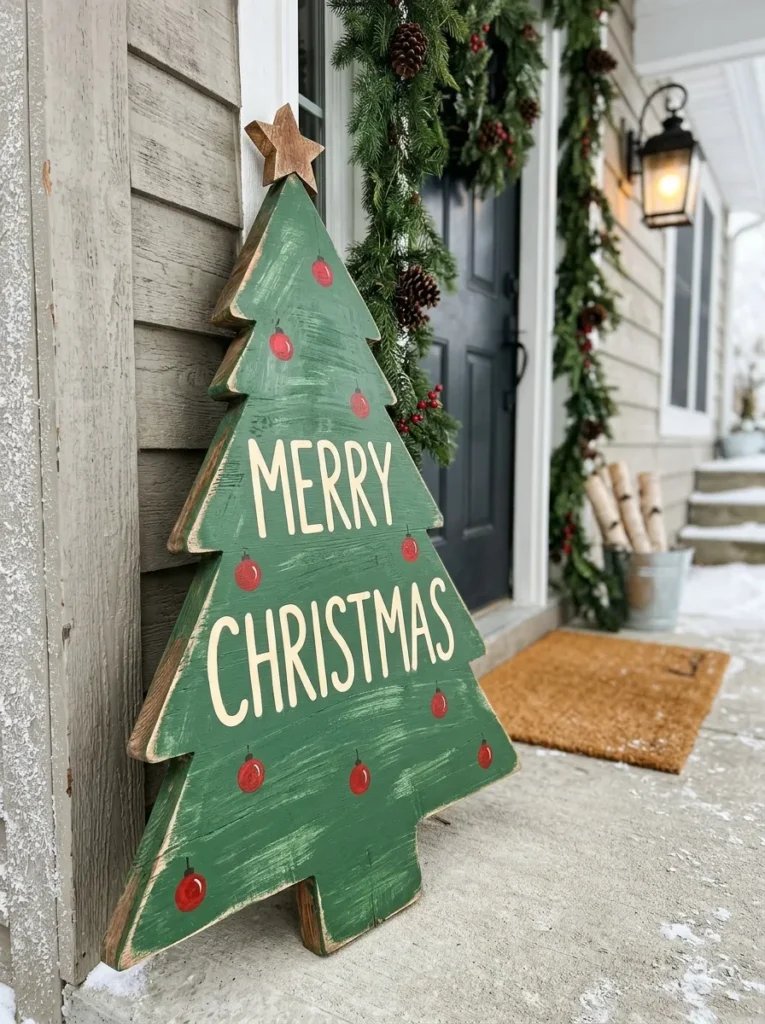
- Tiered triangular pine board silhouette
- Horizontal plank holiday greeting slats
- Crowning wooden star finial
The Look and Technique:
Cutting scrap lumber into a tiered Christmas tree shape creates a playful folk art canvas for holiday greetings.
Best Suited For:
Front porch stair landings and entryway doors.
Pro Stylist Tip:
Paint slats in alternating shades of forest green and cream for rich visual depth.
13. Barn Wood Rustic
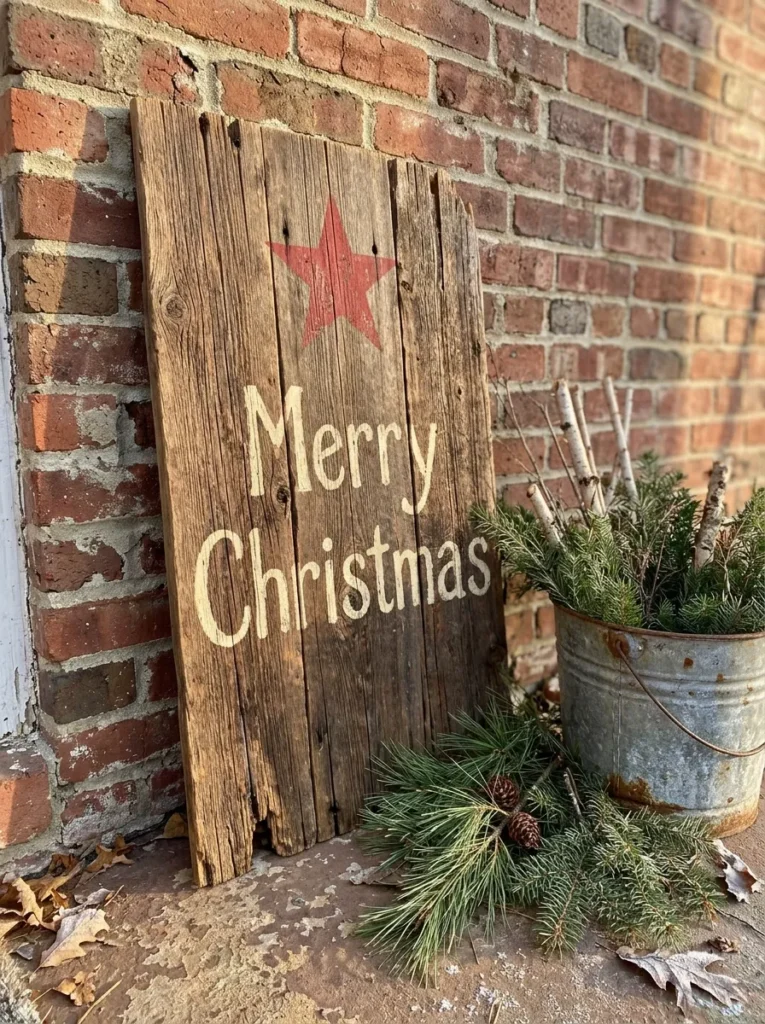
- Authentic century-old weathered barn planks
- Hand-painted rustic block typography
- Natural hand-hewn wood grain showthrough
The Look and Technique:
Using genuine reclaimed barn wood brings authentic American history and rustic soul to holiday curb appeal.
Best Suited For:
Farmhouse entries, rustic cabins, and garden gates.
Pro Stylist Tip:
Leave natural saw marks and nail holes visible, sealing wood with clear matte sealer.
14. Hanging Porch Banner
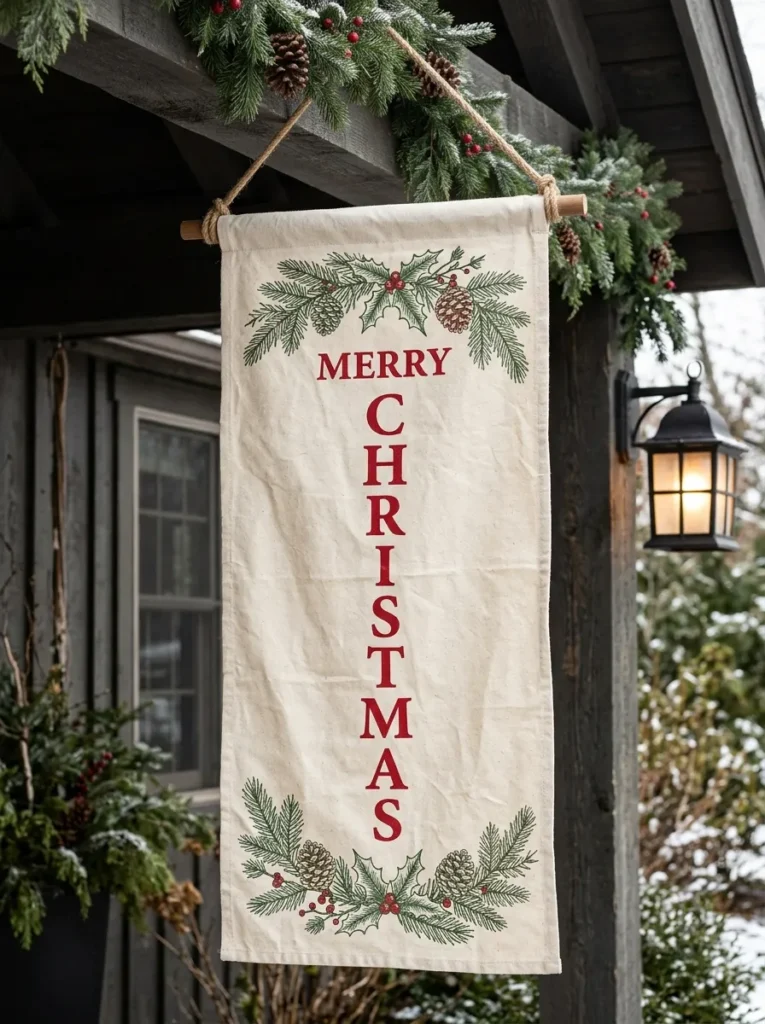
- Heavy 16-ounce outdoor vinyl banner
- Brass perimeter hanging grommets
- Bold festive typographic layout
The Look and Technique:
Suspending a heavy canvas banner between porch columns provides high-impact greetings that roll up compactly for storage.
Best Suited For:
Front porch support columns and portico headers.
Pro Stylist Tip:
Secure banners using bungee ball cords to allow flexible movement in strong winds.
15. Lawn Yard Spikes

- Individual cutout wooden letter stakes
- Push-in metal rebar turf rods
- Evenly spaced lawn border parade
The Look and Technique:
Spelling out holiday words using individual letter stakes marching across front lawns creates bold, welcoming visibility.
Best Suited For:
Front lawn clearings and driveway borders.
Pro Stylist Tip:
Drill bottom holes in wooden letters to insert steel rebar rods that push deep into turf.
16. Snowflake Accent Cutouts
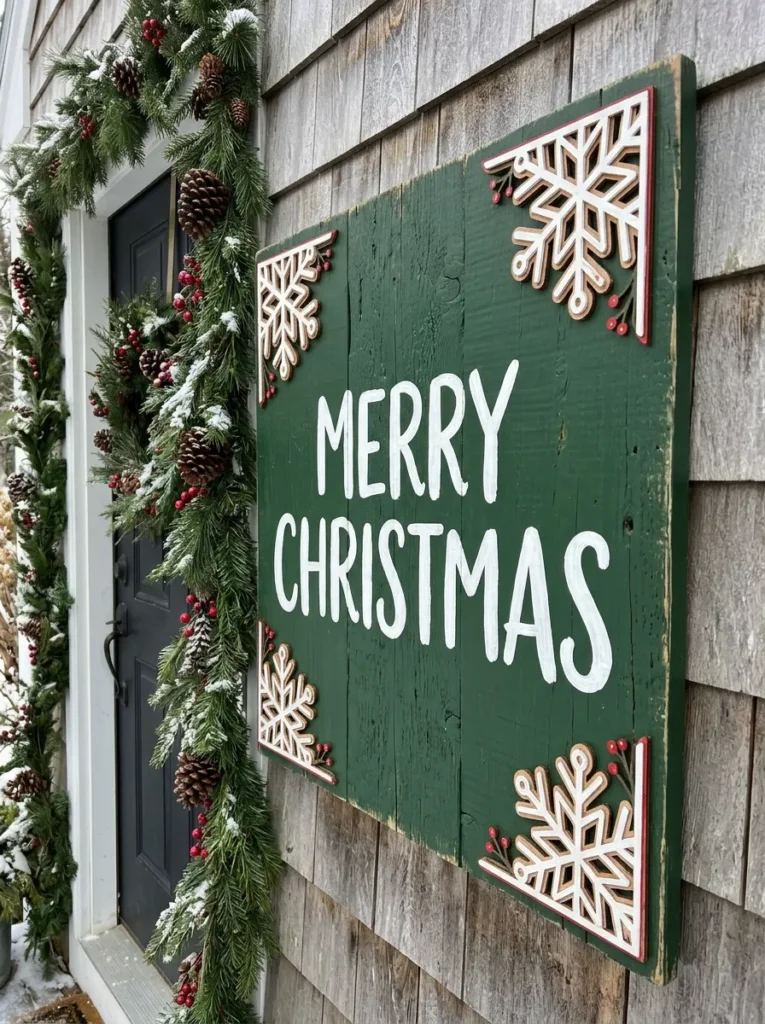
- Plywood snowflake corner accents
- Glittered iridescent white finish
- Dimensional layered relief mount
The Look and Technique:
Accenting wooden signs with raised wooden snowflakes adds sculptural, three-dimensional winter charm.
Best Suited For:
Sign corners and header plaques.
Pro Stylist Tip:
Mount snowflakes with small wood spacers behind to cast subtle drop shadows onto sign boards.
17. Gold Foam Lettering
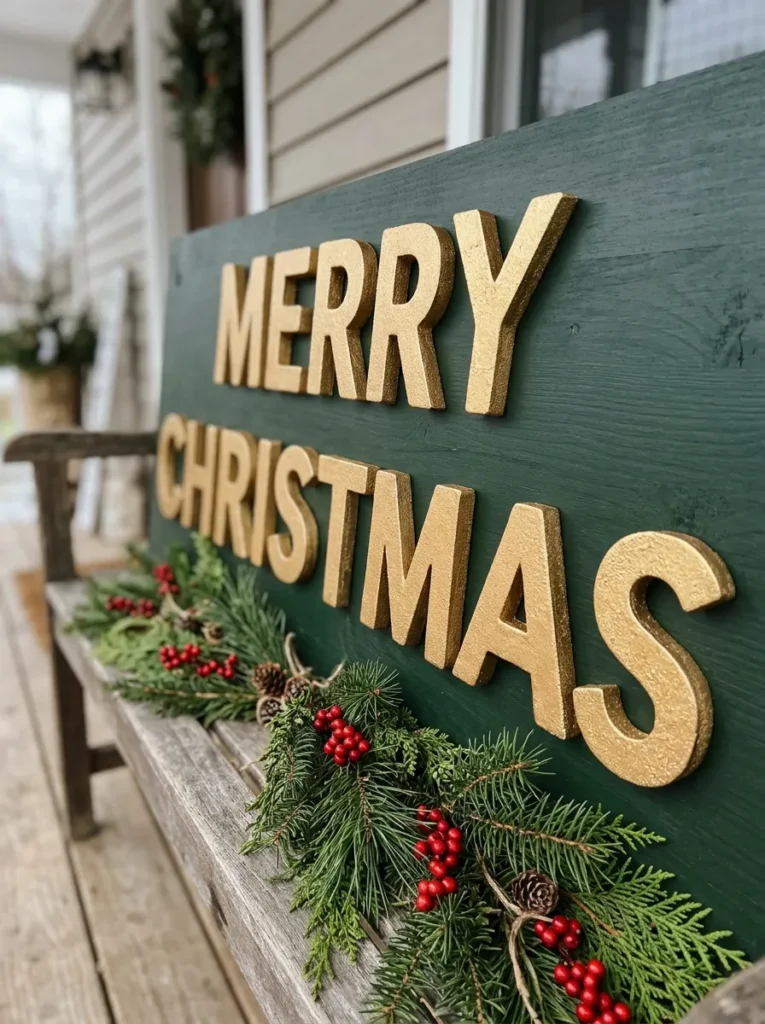
- High-density closed-cell insulation foam
- Metallic gold leaf exterior paint
- Lightweight exterior wall mounting
The Look and Technique:
Cutting letters from dense foam and painting them in metallic gold delivers the opulent look of solid carved metal at minimal cost.
Best Suited For:
Porch headers and exterior brick walls.
Pro Stylist Tip:
Cut insulation foam smoothly using a hot-wire foam cutter for crisp, professional edges.
18. Red Green Paint
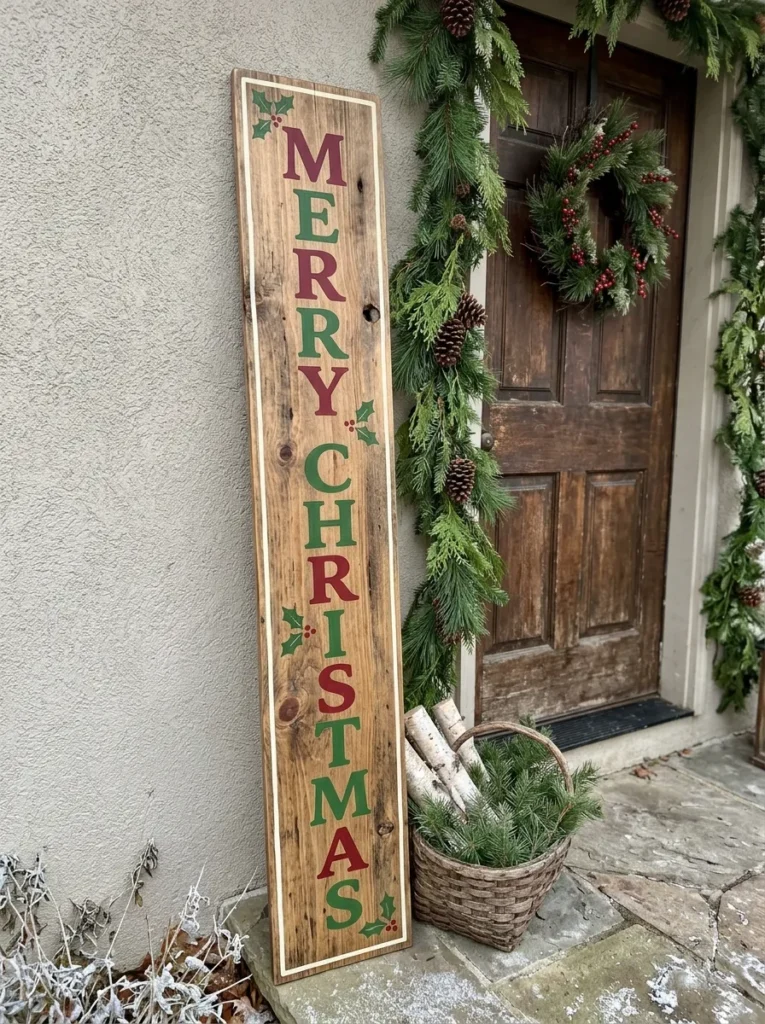
- Classic holiday scarlet and hunter green
- High-gloss exterior enamel finish
- Traditional festive color contrast
The Look and Technique:
Using timeless scarlet and forest green enamel paint delivers classic Christmas warmth that coordinates with natural evergreens.
Best Suited For:
All traditional holiday signage projects.
Pro Stylist Tip:
Apply two thin coats rather than one heavy coat to prevent paint runs and sags.
19. Cursive Wire Bend

- Heavy 8-gauge aluminum armature wire
- Hand-sculpted flowing cursive script
- Wrapped green pine garland accents
The Look and Technique:
Bending thick wire into elegant cursive words wrapped in micro lights creates a delicate, airy sign that floats against walls.
Best Suited For:
Front doors, window headers, and porch railings.
Pro Stylist Tip:
Trace word templates on butcher paper first, bending wire directly over the template outlines.
20. Neon Flex Tubing

- 12V flexible silicone LED neon rope
- Vibrant glowing script lettering
- Weatherproof outdoor adapter power
The Look and Technique:
Mounting modern silicone neon flex tubing onto dark acrylic creates a trendy, radiant holiday sign that glows brilliantly.
Best Suited For:
Front porch entries, modern lofts, and balconies.
Pro Stylist Tip:
Conceal wiring behind the acrylic backing board for a seamless floating look.
21. Arrow Directional Post
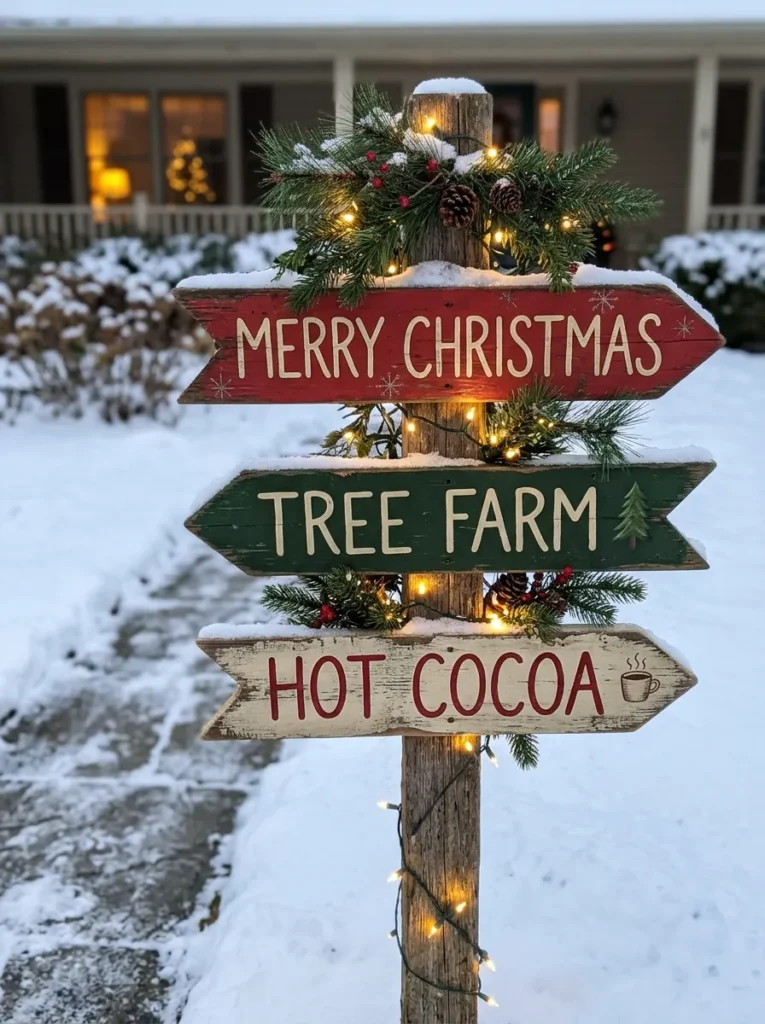
- Multi-tier pointing directional signpost
- Pointing to ‘North Pole’, ‘Elf Village’, ‘Santa’
- Striped candy cane central pole
The Look and Technique:
Planting a whimsical directional signpost pointing toward holiday destinations delights neighborhood children with playful humor.
Best Suited For:
Front lawn walkway intersections and garden corners.
Pro Stylist Tip:
Drive a central metal pipe into ground turf before sliding the decorative signpost over it.
22. Countdown Chalk Easel
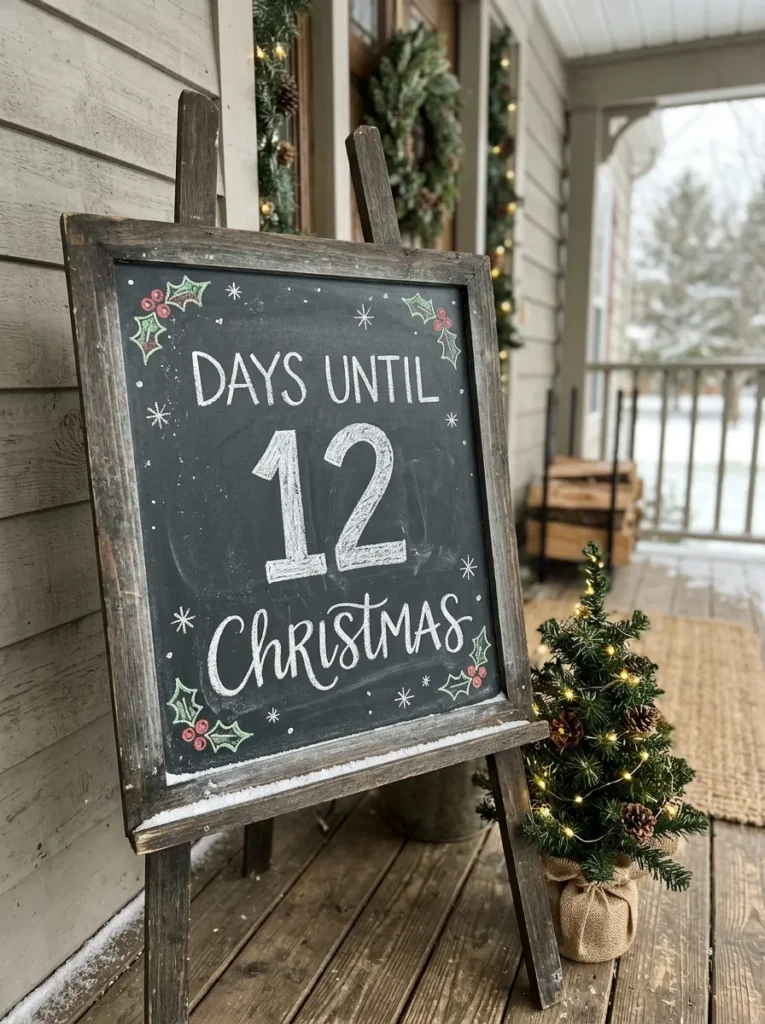
- A-frame folding wooden chalkboard easel
- Daily ‘Days Until Christmas’ countdown
- Surrounding potted evergreen urns
The Look and Technique:
Displaying an interactive countdown easel on your porch builds daily holiday excitement for neighborhood kids.
Best Suited For:
Front porch doorsteps and covered stoops.
Pro Stylist Tip:
Use weatherproof chalkboard paint and seal chalk text with hairspray to prevent rain smudging.
23. Spotlight Lit Panel

- Heavy timber signboard on lawn
- Directional ground LED landscape spotlight
- Casts dramatic evening illumination
The Look and Technique:
Aiming a warm LED landscape spotlight at your wooden holiday sign ensures your handcrafted greeting remains readable all night.
Best Suited For:
Front lawn clearings and flowerbeds.
Pro Stylist Tip:
Position spotlights five feet back from signs angled upward at 45 degrees.
24. Burlap Ribbon Edge
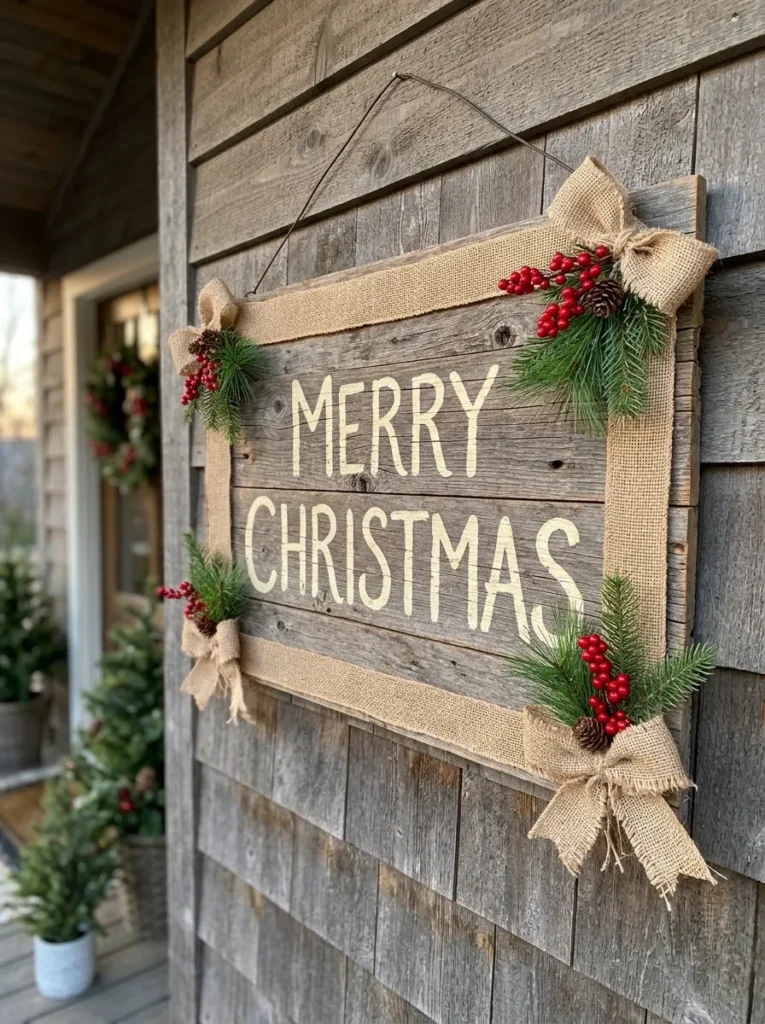
- Natural wide jute burlap ribbon trim
- Pleated ruffled border framing
- Adds rustic country texture to signs
The Look and Technique:
Framing wooden signs with ruffled burlap ribbon borders introduces tactile farmhouse softness to rigid wood edges.
Best Suited For:
Rustic wooden signs and hanging porch plaques.
Pro Stylist Tip:
Attach ribbon to sign backs using stainless steel heavy-duty staples.
25. Vintage Shutter Repurpose
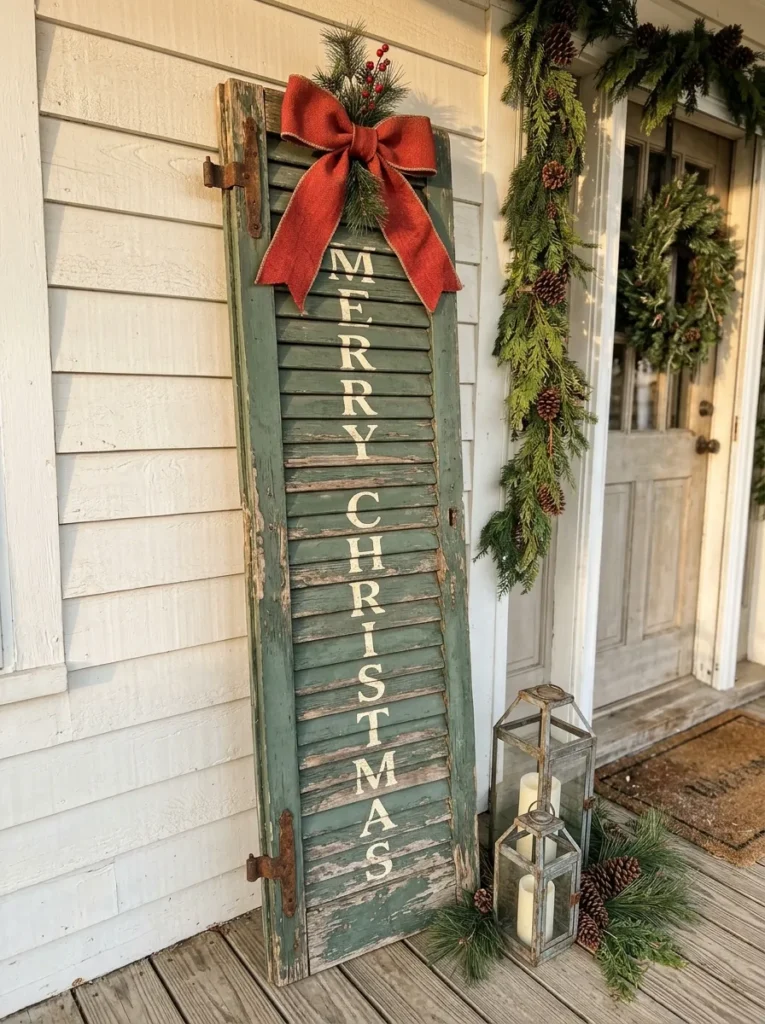
- Salvaged exterior wooden louvered shutter
- Hand-stenciled vertical holiday greeting
- Festive evergreen and bell top swag
The Look and Technique:
Repurposing an architectural wood shutter into a tall holiday sign adds historic charm and vertical height to entryways.
Best Suited For:
Beside front doors and on porch corners.
Pro Stylist Tip:
Tuck sprigs of fresh cedar into louvered slats for added fragrance and texture.
Comprehensive Pro Styling and Maintenance Guide
Executing high-impact styling demands understanding scale, structural safety, and durability. Consult this material and placement matrix before outfitting your space.
| Sign Build | Primary Materials | Key Aesthetic Appeal | Best Placement | Expected Durability |
|---|---|---|---|---|
| Plywood Marquee | 1/2-Inch Plywood & C7s | Showstopping Glow | Front Lawns & Porches | 8-10 Years |
| Vintage Shutter | Salvaged Wood Shutter | Historic Farmhouse | Beside Front Doors | Multi-Year |
| Rope Light Script | Silicone Rope & Wire | Modern Illuminated Art | Porch Railings | 5-8 Years |
| Directional Arrow | Cedar Planks & Post | Playful Storybook | Walkway Intersections | 5+ Years |
| Pallet Board Sign | Reclaimed Pallet Wood | Budget-Friendly Craft | Porch Steps & Stoops | 5+ Years |
DIY Outdoor Holiday Sign Weatherproofing Blueprint
- End Grain Sealing: Apply two coats of exterior spar varnish to all cut lumber end grain to prevent moisture rot.
- Exterior Paint Selection: Use 100% exterior acrylic latex or enamel paints that flex with natural wood expansion.
- Rustproof Fasteners: Assemble signs with exterior-rated ceramic screws or stainless steel hardware to prevent rust streaks.
- Wind Anchoring: Fasten tall leaner signs to porch posts with discreet eyelet hooks to prevent gust toppling.
- Electrical Safety: Ensure all illuminated signs use outdoor-rated wiring connected to GFCI-protected circuits.
Frequently Asked Questions
What is the best wood to use for an outdoor Christmas sign?
Cedar, redwood, and pressure-treated pine offer the best natural resistance to rot and moisture. Exterior-grade ACX plywood also works wonderfully when properly sealed.
How do I waterproof a hand-painted wooden sign for outdoor use?
Apply two to three thin coats of exterior marine spar urethane over your painted design. Spar urethane contains UV blockers and flexes with outdoor temperature shifts.
How can I make letters on a DIY wooden sign look clean and professional?
Print computer fonts onto paper, transfer outlines using carbon transfer paper, and paint within lines using high-quality angled synthetic detail brushes.
How do I illuminate a non-electric wooden sign at night?
Place a small 5-watt warm-white LED landscape spotlight in your garden bed aimed upward at the sign from five feet away.
How do I keep a freestanding outdoor wooden sign from blowing over in wind?
Attach a rear diagonal 2×4 kickstand weighted with concrete paving stones, or drive metal rebar stakes deep into the lawn behind the sign.
Final Editorial Verdict and Styling Recommendation
Building a custom outdoor holiday sign is a deeply rewarding project that welcomes neighbors and family with handcrafted pride. High-quality finishes turn scrap lumber into treasured holiday heirlooms.
Apply durable weather-sealed finishes, illuminate your signs with warm evening lights, and enjoy greeting your entire community with festive cheer.Visit nashradecor for more details.