19 Amazing Homemade Halloween Decorations on Zero Budget
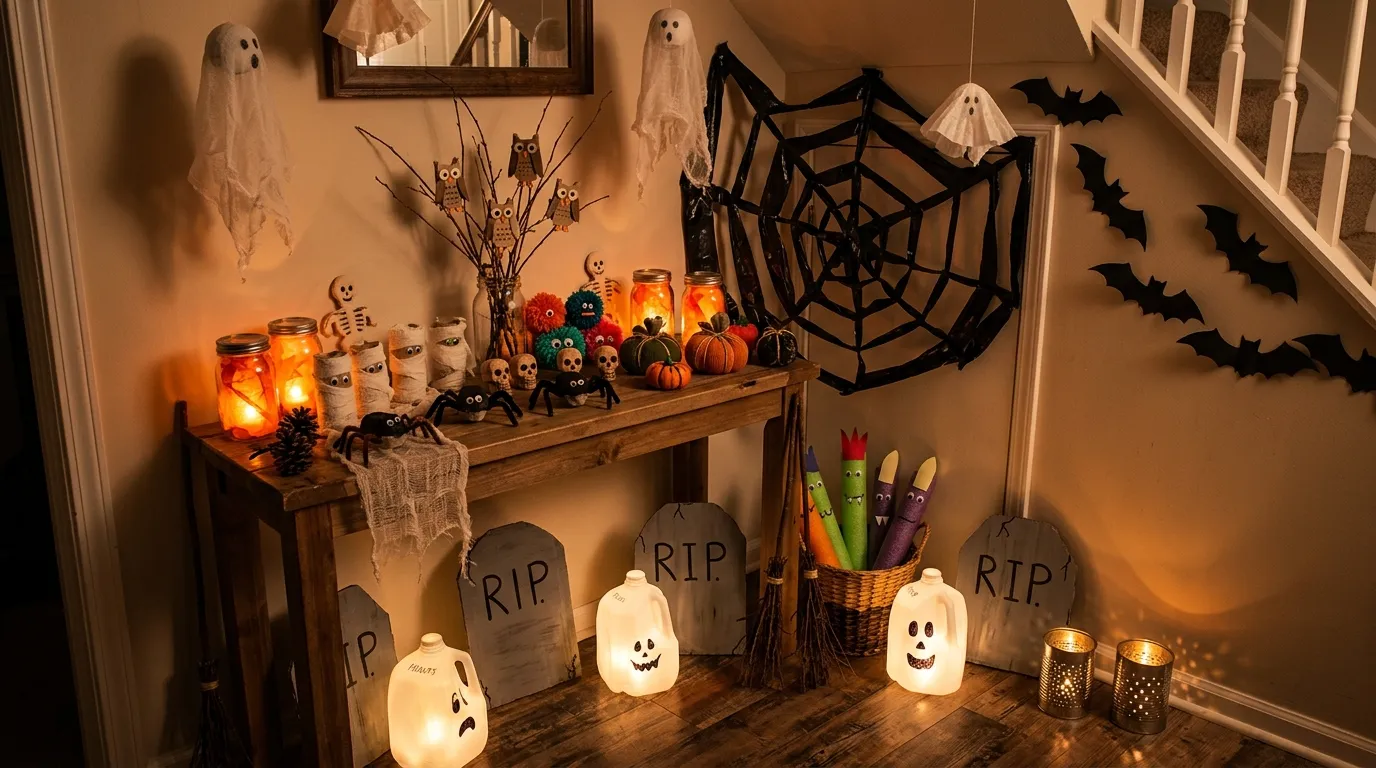
Curating a magical Halloween home does not require expensive store purchases. Resourceful creators transform everyday household recyclables into captivating, museum-worthy seasonal installations with imagination and technique.
Mastering zero-budget holiday styling relies on texture, repetition, and lighting. Gathering common materials like paper, glass jars, and fallen garden twigs produces cohesive, atmospheric displays that outshine cheap store-bought plastic. These creative techniques also reflect the principles of interior decorating, helping you create a cohesive and visually appealing Halloween atmosphere on a budget.
Key Takeaways
- Upcycle household pantry staples.
- Distress paper with tea.
- Layer eerie silhouette cutouts.
- Utilize flameless safety tea-lights.
The Art of High-Impact Zero-Waste Crafting
Homemade Halloween Decorations Repetition creates elegance. Cutting five paper bats looks like child craft; cutting one hundred identical bats and swarming them across a white wall creates breathtaking sculptural installation art.
Distressing techniques bridge the gap between homemade craft and authentic antique decor. Diluted black tea, acrylic washes, and gentle edge-sanding infuse raw materials with century-old vintage charm.
1. Paper Bat Garland
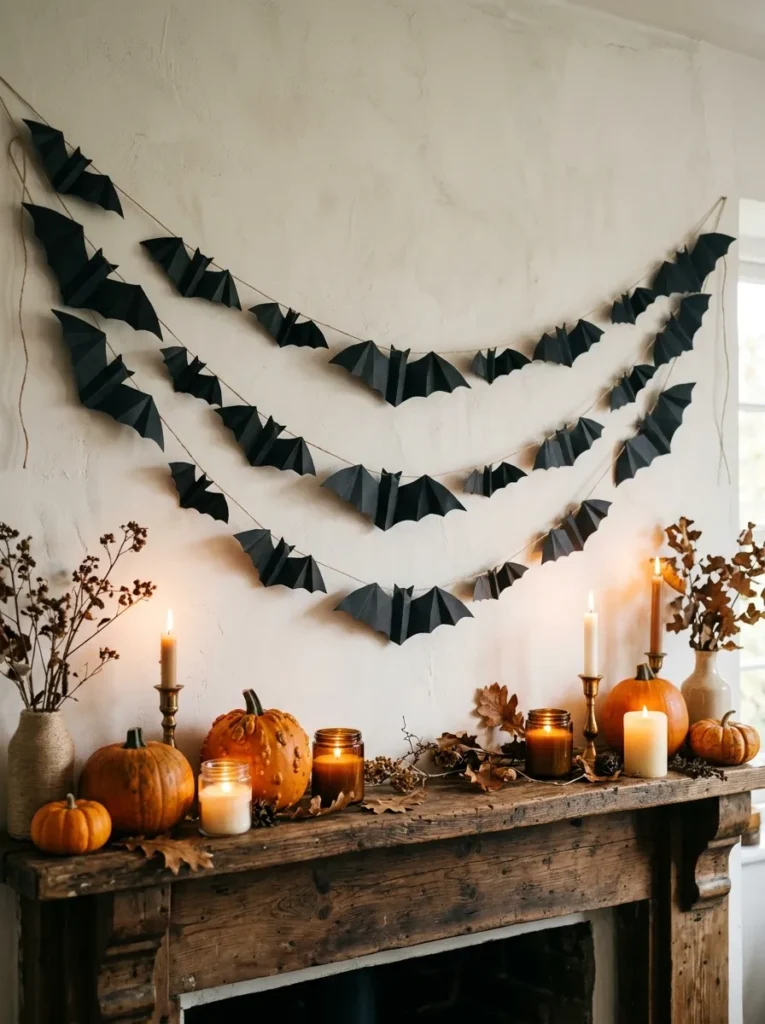
- Heavy black cardstock sheets
- Scored dimensional wing folds
- Invisible monofilament string
The Look and Technique:
Cutting hundreds of simple bat silhouettes in varying sizes and scoring down the center creates dramatic 3D flight swarms. Clustered along staircases or rising up fireplace mantels, they bring dynamic kinetic energy.
Best Suited For:
Interior fireplace walls, sweeping stair risers, and tall entryway archways.
Pro Stylist Tip:
Adhere bats using removable mounting putty to protect delicate wall paint from tearing.
2. Toilet Roll Mummies
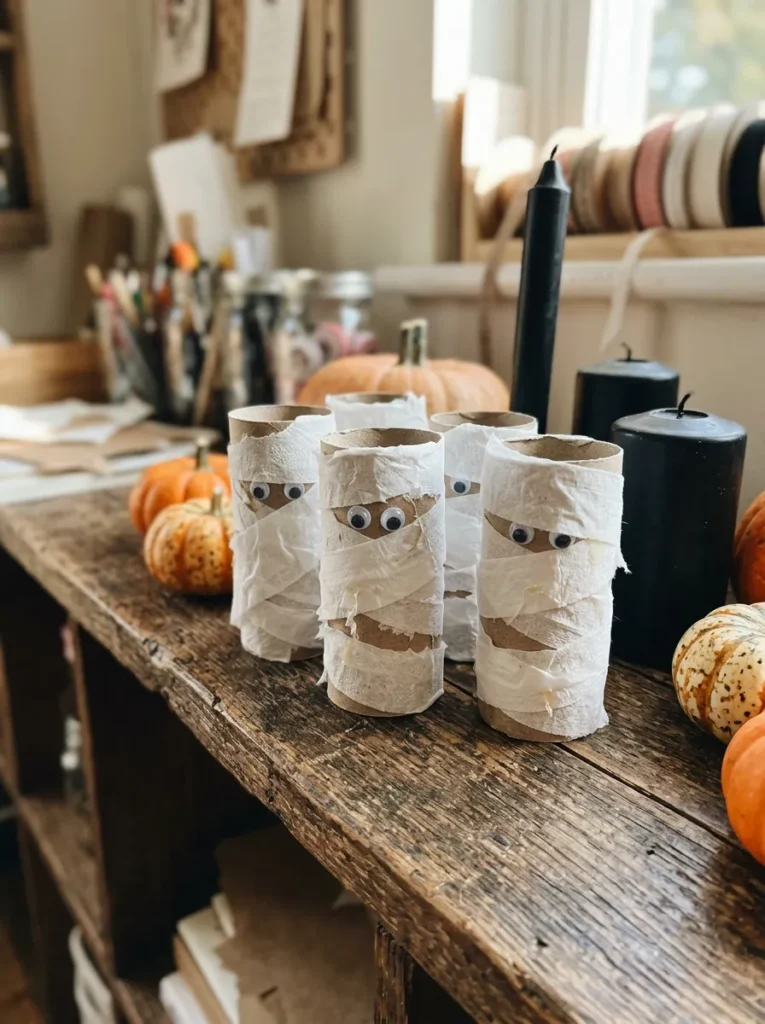
- Upcycled cardboard core tubes
- Sterile gauze bandage wrap
- Googly plastic peering eyes
The Look and Technique:
Wrapping cardboard tubes in loose, fraying gauze bandages creates charming miniature mummy desk guards. Staggering heights across bookshelves adds playful handmade personality.
Best Suited For:
Children crafting stations, bookshelf ledges, and windowsill groupings.
Pro Stylist Tip:
Dab wet tea bags across white gauze to achieve authentic antique Egyptian sarcophagus staining.
3. Milk Jug Ghosts
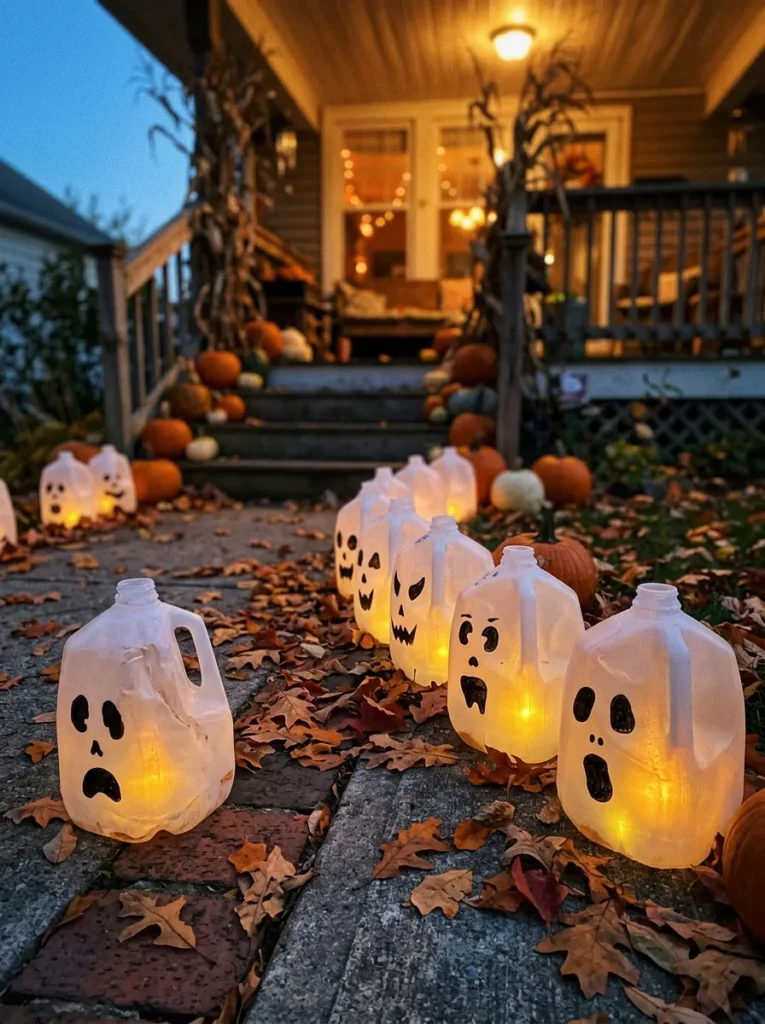
- Clean gallon plastic jugs
- Permanent black marker faces
- Warm battery tea light inserts
The Look and Technique:
Drawing whimsical spectral faces on clean gallon milk jugs and illuminating from within with LED tea lights yields charming porch lanterns for zero cost.
Best Suited For:
Front porch steps, garden border paths, and driveway edges.
Pro Stylist Tip:
Fill jug bottoms with two cups of pea gravel to keep autumn winds from tipping them.
4. Cardboard Tombstones
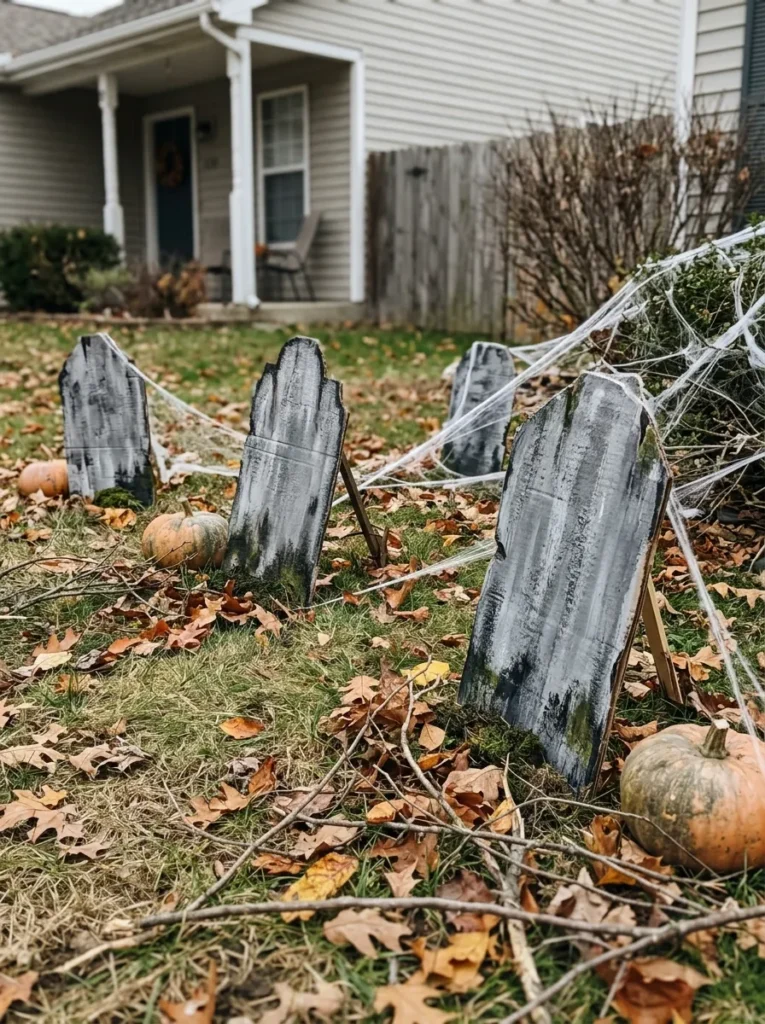
- Corrugated appliance shipping boxes
- Aged gray textured spray paint
- Chiseled humorous epitaph carvings
The Look and Technique:
Cutting thick shipping boxes into historic arched headstones and coating with textured stone spray paint replicates centuries-old granite cemetery markers.
Best Suited For:
Front lawn graveyard scenes and front walkway garden beds.
Pro Stylist Tip:
Tape wooden paint stir sticks to the back cardboard and press into the lawn for invisible support.
5. Pool Noodle Fingers
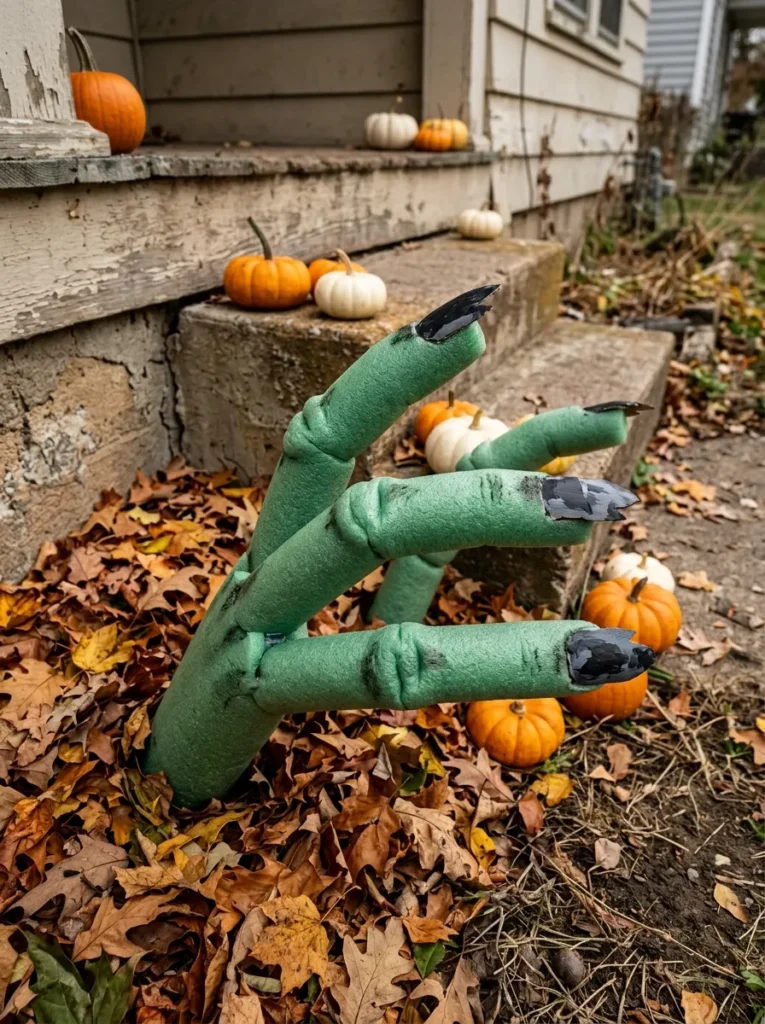
- Cut foam water noodles
- Hot glue joint wrinkles
- Cardboard jagged fingernails
The Look and Technique:
Sectioning foam pool noodles, shaping joint knuckles with low-temp hot glue, and inserting pointed faux nails produces creeping zombie hands reaching from garden soil.
Best Suited For:
Garden mulch beds, porch planters, and lawn edge borders.
Pro Stylist Tip:
Coat foam with a mix of acrylic paint and Mod Podge to prevent paint from peeling when foam flexes.
6. Mason Jar Lanterns
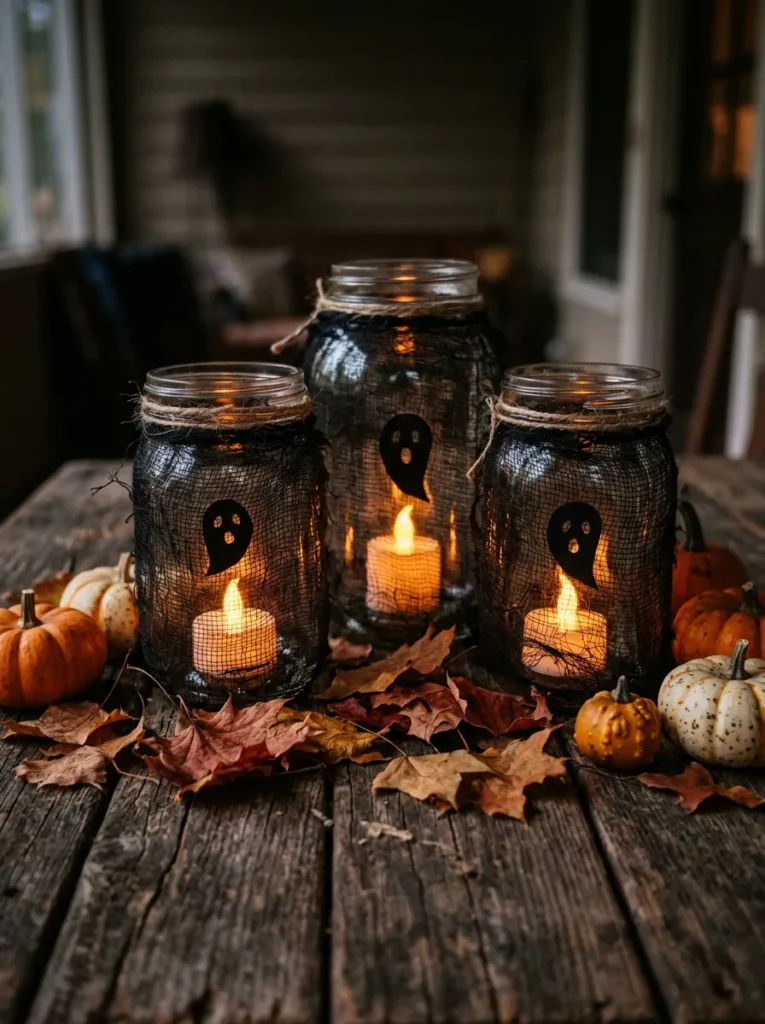
- Repurposed canning jars
- Translucent orange tissue paper
- Black silhouette vinyl decals
The Look and Technique:
Decoupaging orange and black tissue paper onto canning jars with water-thinned glue diffuses candle flame into magical stained-glass autumn lanterns.
Best Suited For:
Dining table runners, mantel ledges, and outdoor dining tables.
Pro Stylist Tip:
Use battery-operated flickering tea lights rather than real flames to avoid overheating jar glass.
7. Cheesecloth Specters
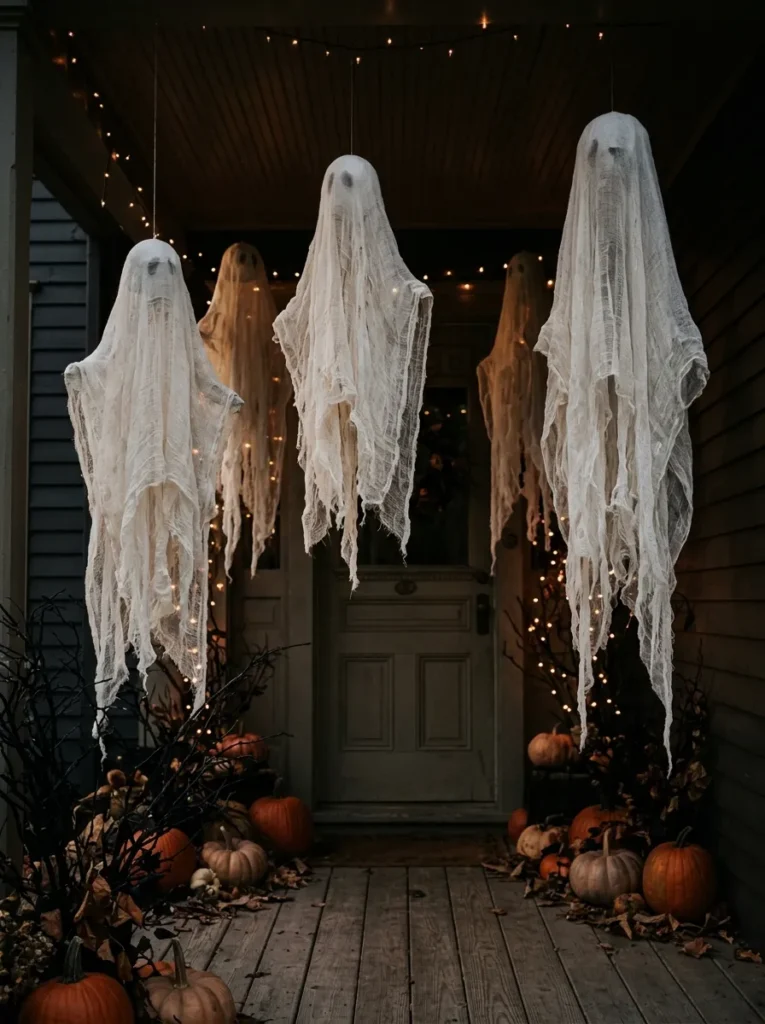
- Loose weave cotton cheesecloth
- Liquid fabric starch soak
- Balloon armature mold support
The Look and Technique:
Draping starch-soaked cheesecloth over balloons and letting it harden produces stiff, freestanding floating phantoms without visible wire armatures.
Best Suited For:
Entryway console tables, covered porch displays, and buffet servers.
Pro Stylist Tip:
Shred the lower cloth edges with sharp scissors before starching for a wispy, ethereal hemline.
8. Egg Carton Spiders
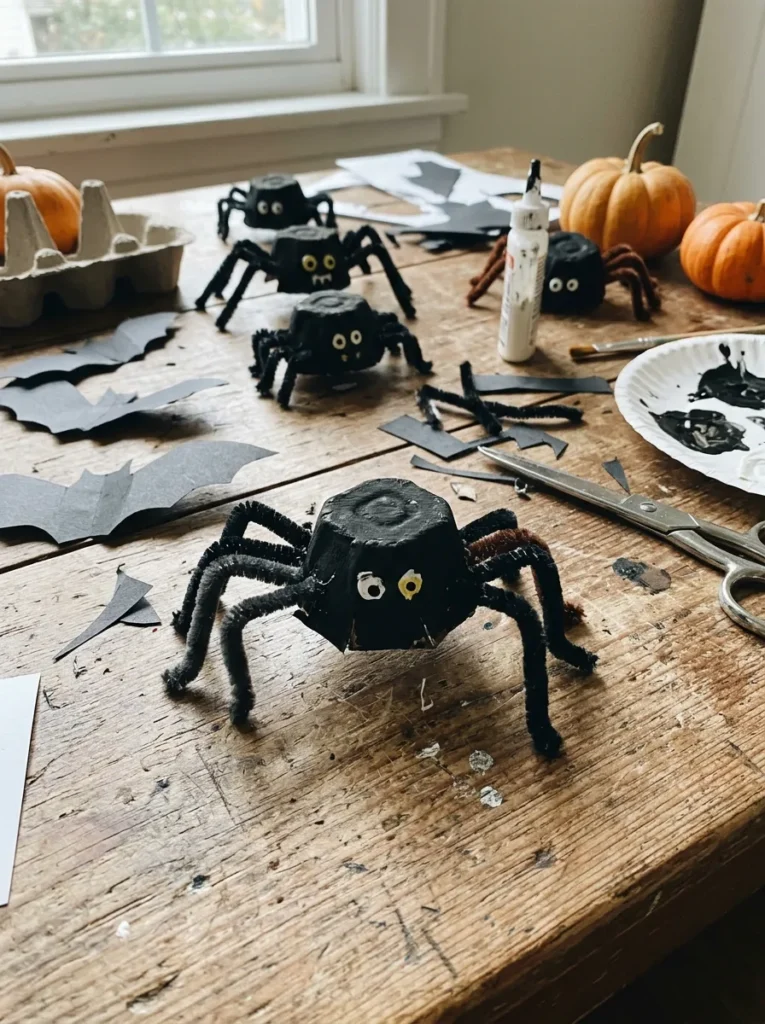
- Molded cardboard egg cups
- Matte black acrylic paint
- Flexible pipe cleaner legs
The Look and Technique:
Inverting molded egg cups and attaching black pipe cleaner legs creates charming, fuzzy arachnids that cling playfully to curtains and lampshades.
Best Suited For:
Indoor curtain swags, indoor plant stems, and Halloween dining place settings.
Pro Stylist Tip:
Glue small red seed beads for eyes to catch lamp light with eerie micro-shimmer.
9. Twig Witch Brooms
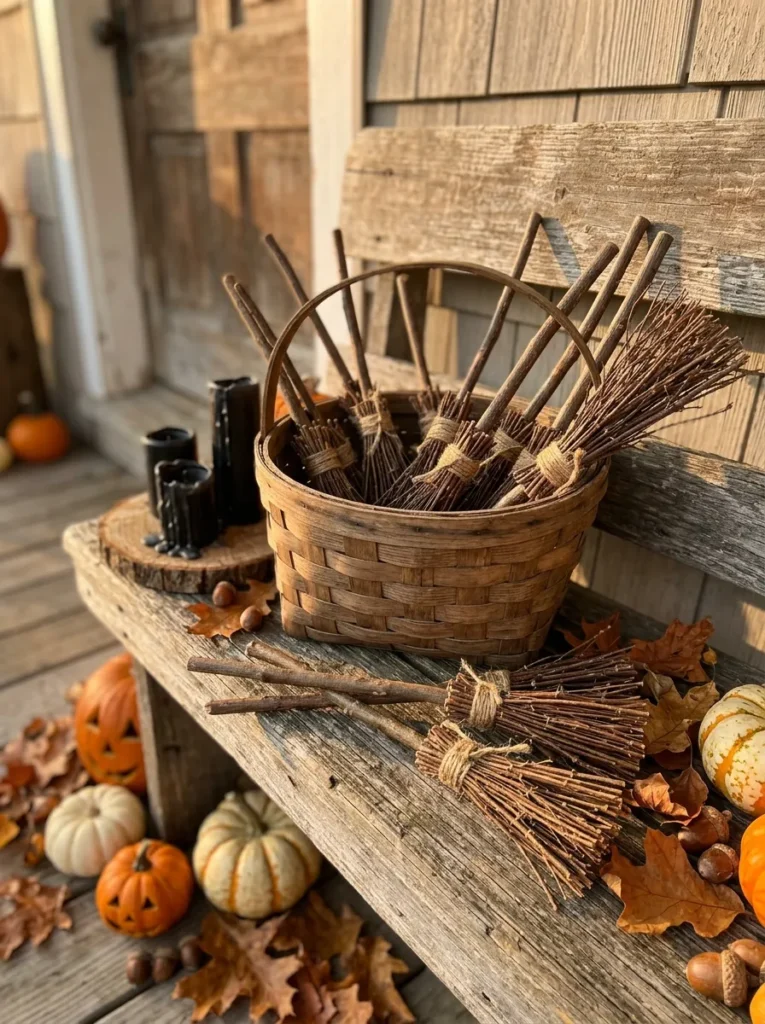
- Gathered backyard fallen twigs
- Rustic natural jute twine
- Sturdy birch walking branch
The Look and Technique:
Bundling fallen yard twigs tightly around a weathered tree branch with natural jute twine produces authentic rustic broomsticks straight from a storybook cottage.
Best Suited For:
Front porch door leaning corners and fireside hearth broom holders.
Pro Stylist Tip:
Soak twigs in water before binding to bend them tightly without snapping.
10. Painted Rock Pumpkins
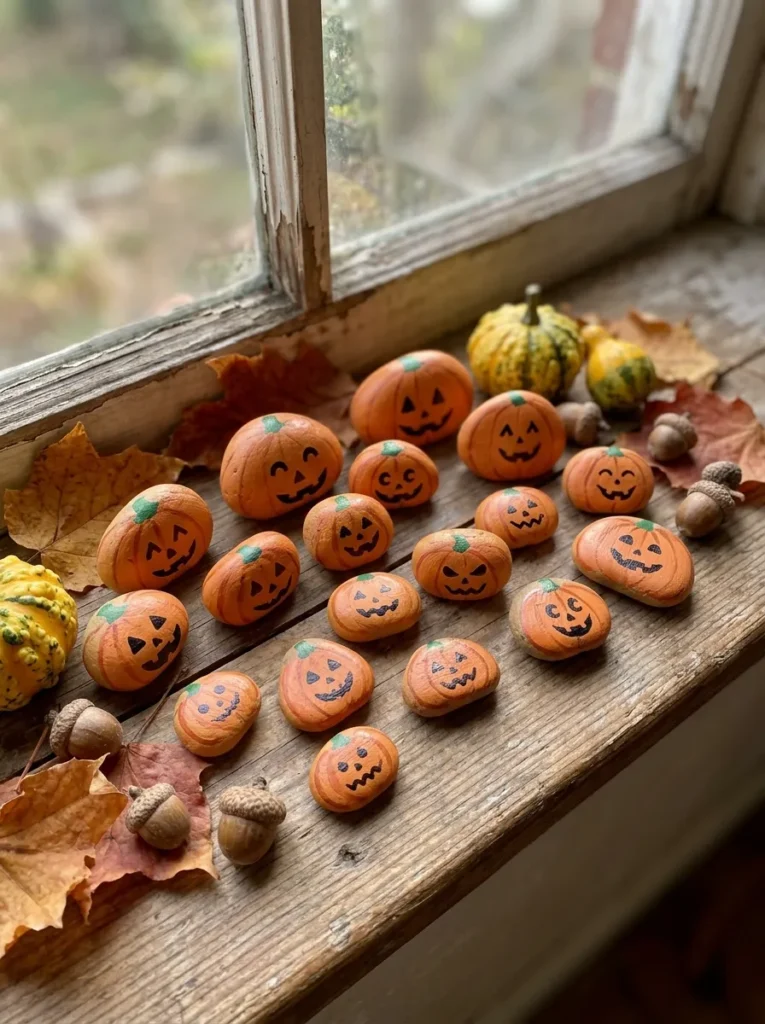
- Smooth river landscape stones
- Saturated acrylic craft paint
- Fine tip black detail pens
The Look and Technique:
Transforming smooth oval stones into bright orange and ghost-white pumpkins creates durable, weather-resistant garden accents that cost practically nothing.
Best Suited For:
Garden gravel pathways, flowerpots, and porch stair risers.
Pro Stylist Tip:
Finish painted rocks with a coat of outdoor spar urethane to protect art from autumn rains.
11. Wine Cork Skulls
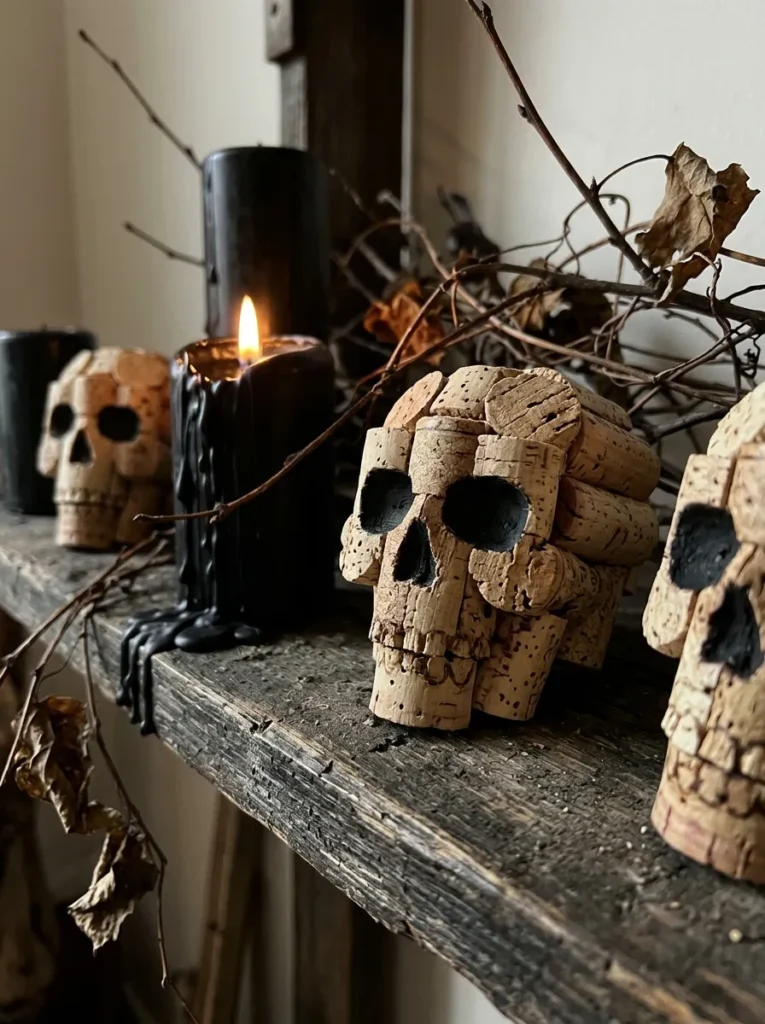
- Recycled natural wine corks
- White chalk paint dip
- Fine tip permanent ink pens
The Look and Technique:
Dipping wine corks into chalk paint and hand-drawing miniature skeletal grins yields quirky accents for bowl fillers and DIY Halloween garland strands.
Best Suited For:
Glass apothecary jar fillers and seasonal charcuterie boards.
Pro Stylist Tip:
Drill a small hole through the top to string corks onto black twine as an artisan garland.
12. Trash Bag Webs
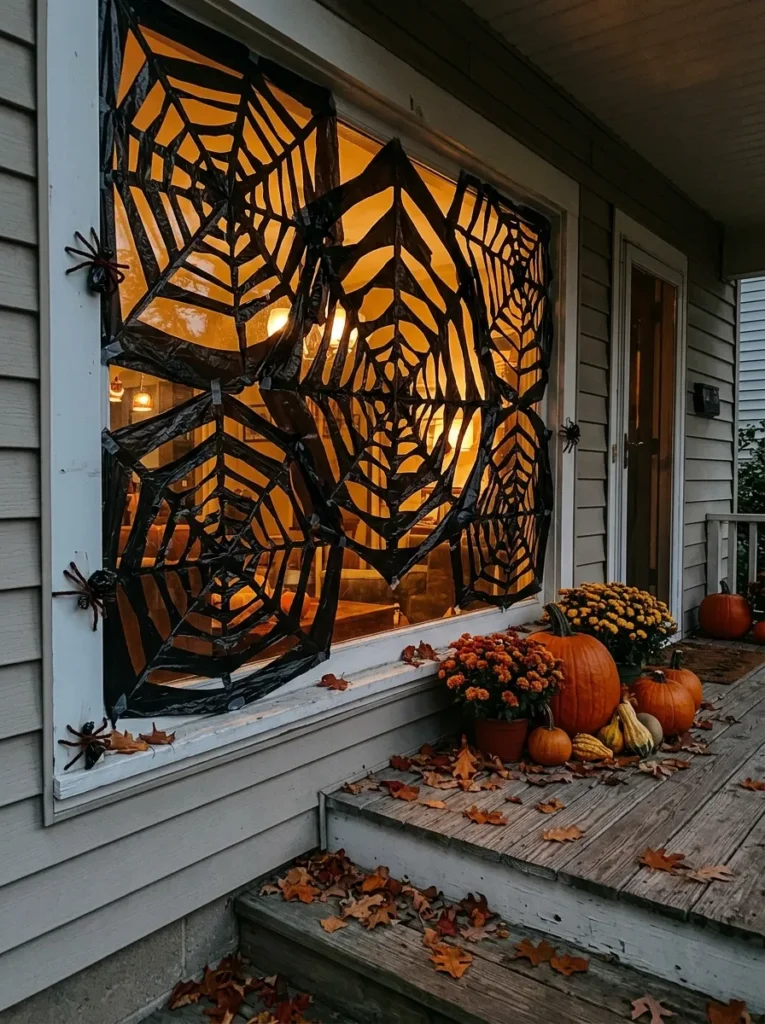
- Heavy duty black garbage bags
- Precision folded paper snowflake cuts
- Expansive wall mounting tape
The Look and Technique:
Folding black plastic bags and cutting radial notches like paper snowflakes unfurls massive, ten-foot cobwebs for pennies.
Best Suited For:
Garage doors, blank basement walls, and large picture windows.
Pro Stylist Tip:
Iron bags on lowest heat through parchment paper first to smooth factory wrinkles.
13. Coffee Filter Ghouls
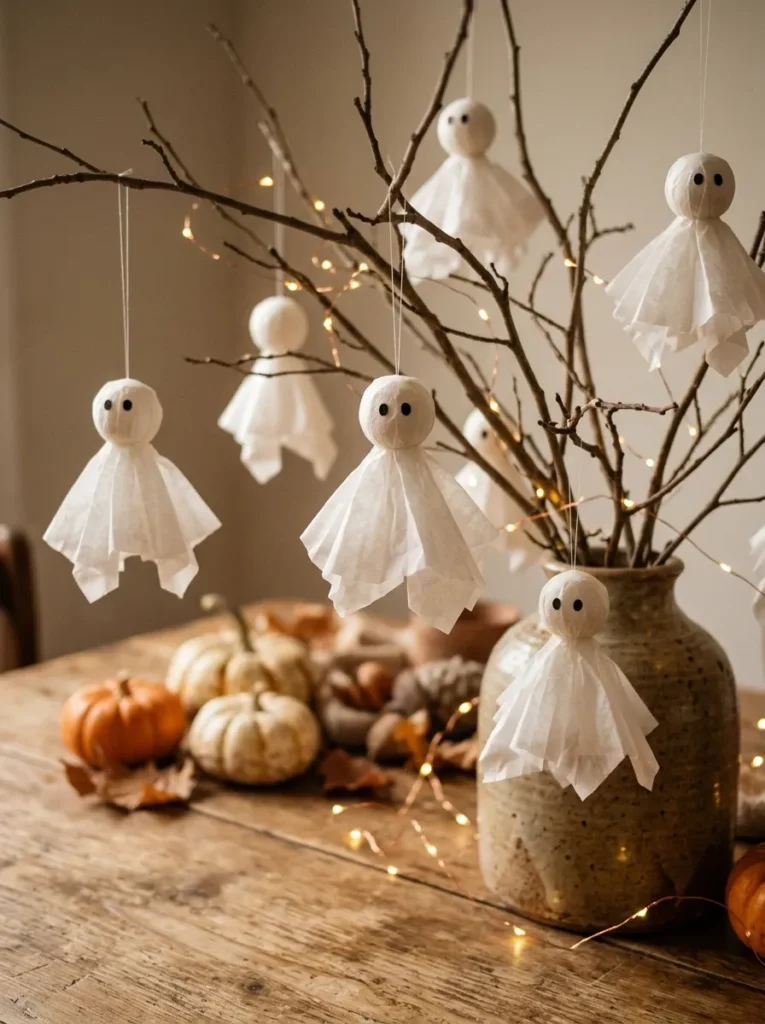
- Fluted white paper coffee filters
- Black ink stamped expressions
- Hanging white thread loops
The Look and Technique:
Tiering pleated paper coffee filters over cotton balls creates delicate, floating spirits that flutter with room air circulation.
Best Suited For:
Ceiling light fixtures, chandelier arms, and bedroom ceilings.
Pro Stylist Tip:
Use needle and fishing line to suspend at varying ceiling heights for cloud-like depth.
14. Yarn Pom Monsters
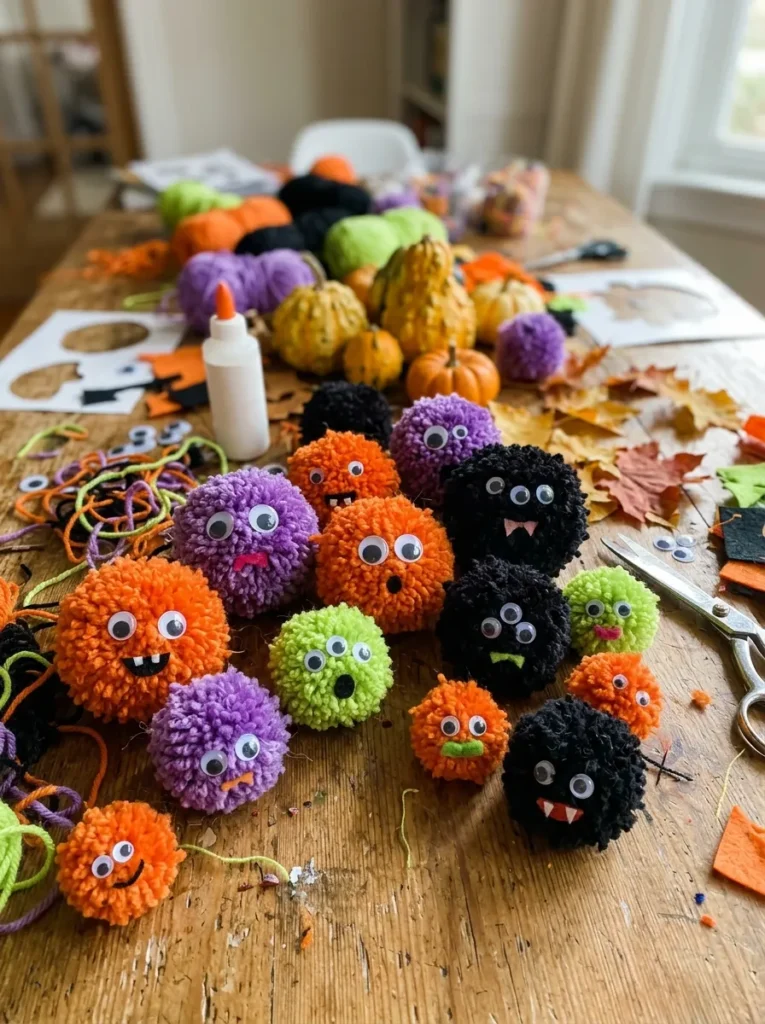
- Scrap skeins of purple and orange yarn
- Mismatched plastic googly eyes
- Fluffy shears trimmed sphere
The Look and Technique:
Winding scrap yarn into fluffy pom-poms and gluing playful multi-eyes produces adorable, soft creatures that delight toddlers without frightening them.
Best Suited For:
Playroom shelves, child bedroom desks, and seasonal door wreaths.
Pro Stylist Tip:
Steam poms over a boiling kettle to fluff fiber ends into cloud-like fullness.
15. Clothespin Owls
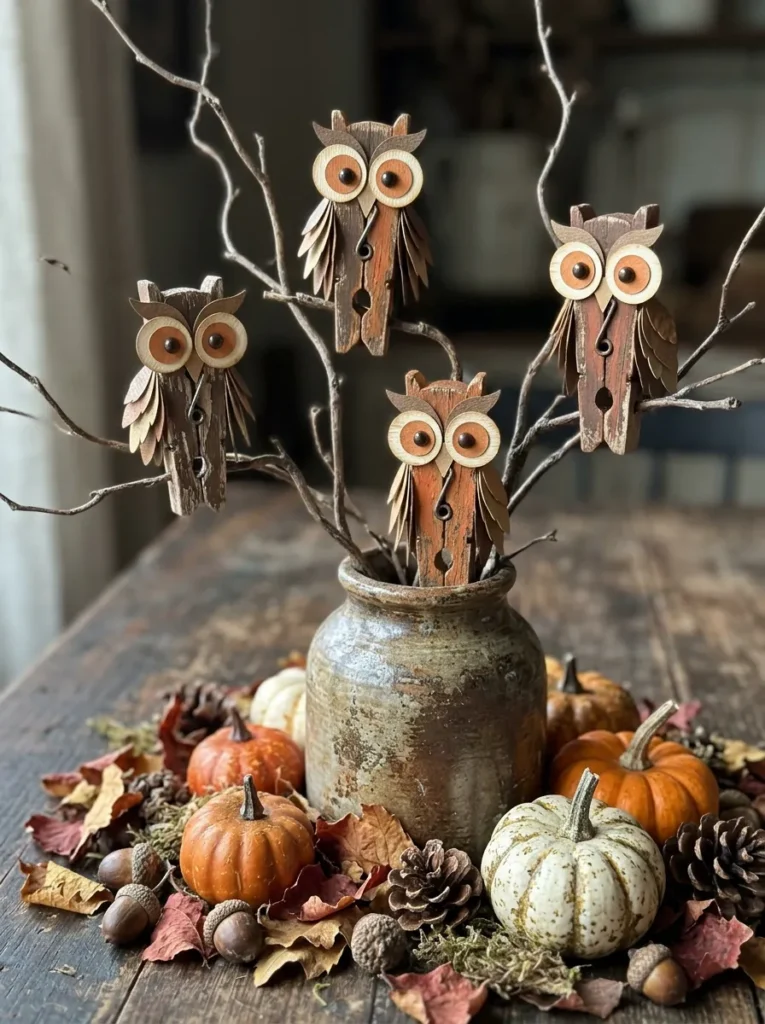
- Vintage spring wooden clothespins
- Dyed brown craft felt wings
- Tiny yellow felt beak points
The Look and Technique:
Painting wooden clothespins brown and clipping them onto branches with felt wings turns ordinary branches into a mysterious roosting owl tree.
Best Suited For:
Indoor potted ficus trees, twig vase arrangements, and seasonal gift tags.
Pro Stylist Tip:
Clip onto brown cardstock place cards at autumn dinner party settings.
16. Tin Can Luminaries
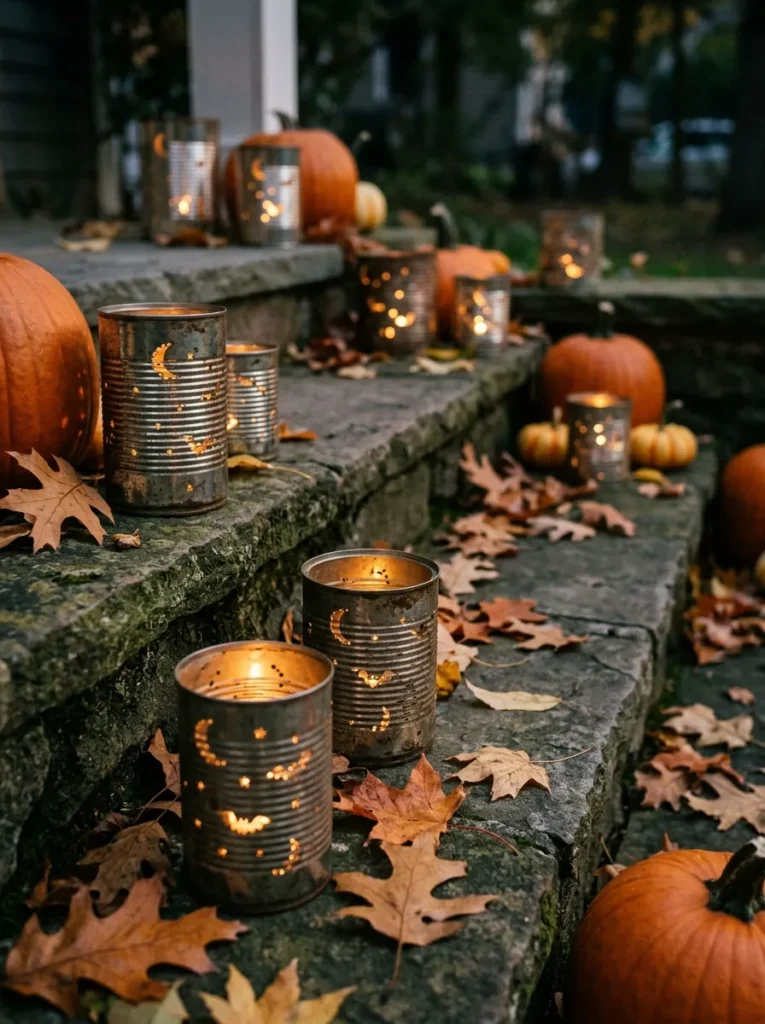
- Recycled metal soup cans
- Nail punched patterned holes
- Dark exterior spray paint
The Look and Technique:
Freezing water in empty soup cans, hammering constellation holes with a nail, and inserting tea lights casts magical pierced-light patterns across porches.
Best Suited For:
Front porch steps, garden patio railings, and walkway edges.
Pro Stylist Tip:
Always freeze water inside cans first; solid ice prevents thin metal from denting under hammer blows.
17. Salt Dough Skeletons
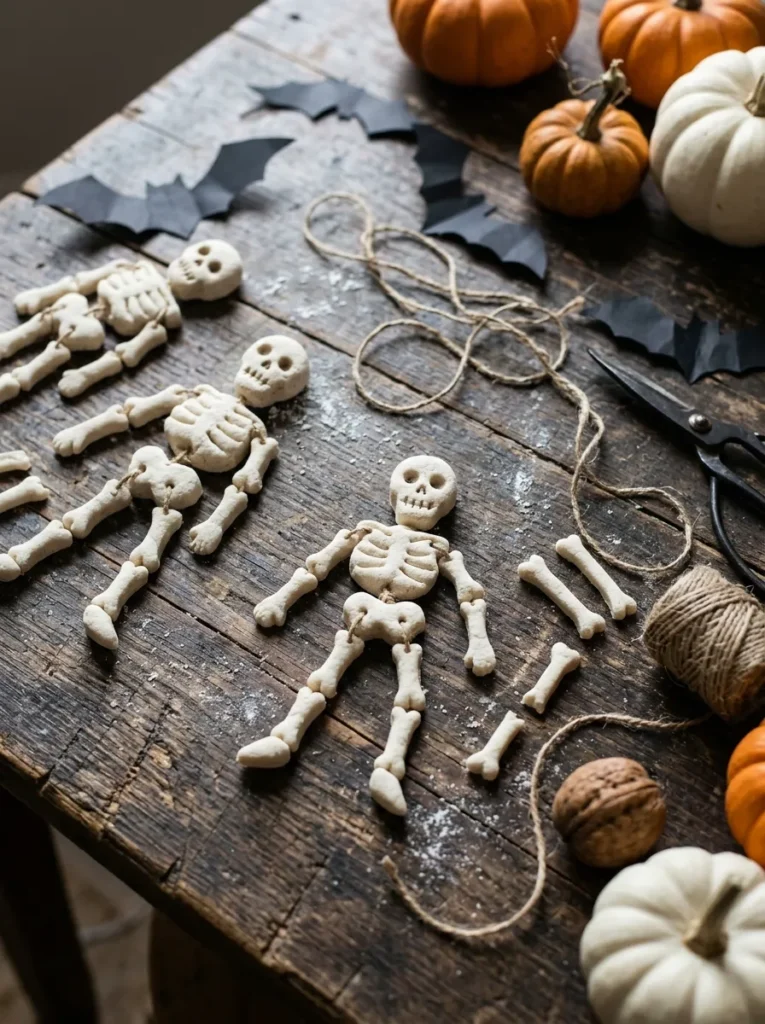
- Flour salt water dough mixture
- Hand sculpted bone replica shapes
- Slow baked matte finish
The Look and Technique:
Mixing kitchen staples into salt dough and sculpting stylized ribcages and femurs produces durable, bone-white relics that last for years.
Best Suited For:
Curiosity cabinet shadow boxes, rustic wreaths, and tabletop urns.
Pro Stylist Tip:
Bake at two hundred degrees for three hours until completely dehydrated to prevent mold.
18. Pinecone Crows
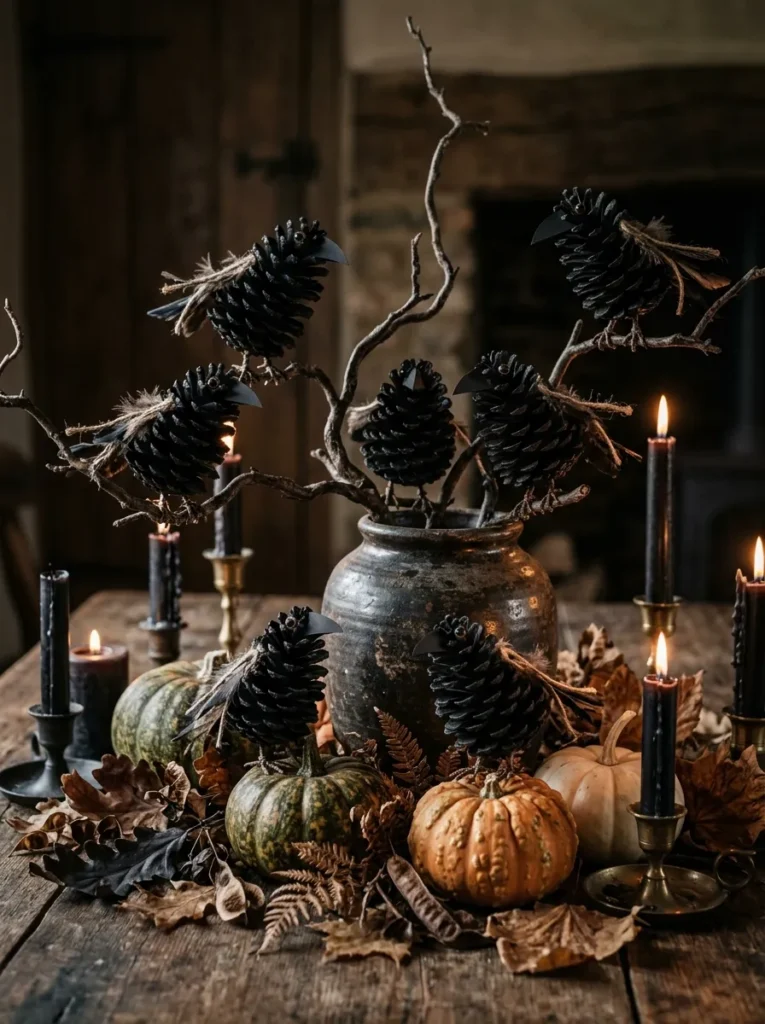
- Foraged outdoor pine cones
- Matte black paint saturation
- Cardstock beaks and tail feathers
The Look and Technique:
Painting pinecones jet black and adding triangular paper beaks creates charming, stylized crows that tuck effortlessly into autumnal garlands.
Best Suited For:
Fireplace mantel greenery, dining centerpieces, and wreath accents.
Pro Stylist Tip:
Angle beak points downward to make crows look inquisitive and alert.
19. Sock Stuffed Gourds
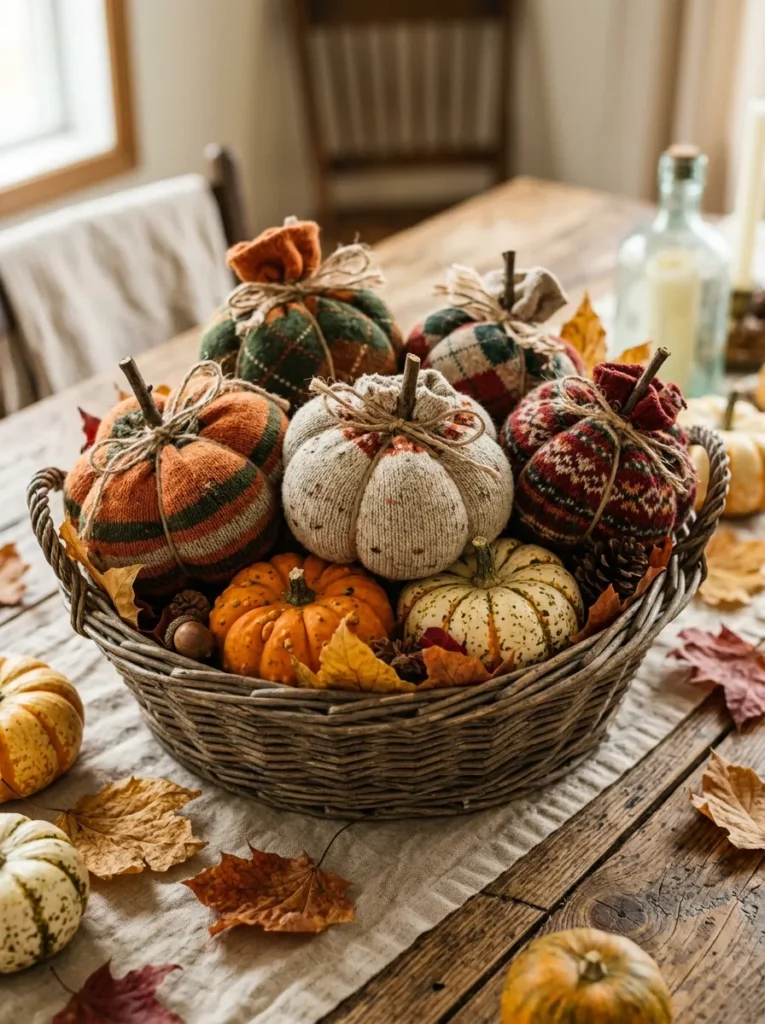
- Old cable knit cream socks
- Rice or polyfill stuffing core
- Real dried natural pumpkin stem
The Look and Technique:
Filling old textured socks with uncooked rice and cinching with twine creates cuddly, chic fabric pumpkins topped with real backyard stems.
Best Suited For:
Sofa cushion clusters, entryway benches, and cozy bedroom nightstands.
Pro Stylist Tip:
Hot-glue genuine dried pumpkin stems saved from last year to fool the eye with realism.
Comprehensive Pro Styling and Maintenance Guide
Executing high-impact styling demands understanding scale, structural safety, and durability. Consult this material and placement matrix before outfitting your space.
| Craft Project | Base Household Material | Prep Time | Difficulty Level | Durability Rating |
|---|---|---|---|---|
| Bat Wall Swarm | Black scrap cardstock | 30 Minutes | Beginner | Reusable for years |
| Starch Cheesecloth Ghost | Cheesecloth & starch | 45 Minutes | Intermediate | Indoor multi-season |
| Tin Can Luminaries | Recycled soup cans | 20 Minutes | Beginner | Weatherproof outdoor |
| Cardboard Tombstones | Shipping appliance boxes | 60 Minutes | Intermediate | Protected porch season |
| Salt Dough Bones | Flour, salt & water | 90 Minutes | Advanced | Years if kept dry |
Zero-Budget Maker Master Protocol
- Raid Household Recyclables Early: Begin saving glass jars, egg cartons, and clean cardboard boxes in August to accumulate sufficient materials.
- Standardize Paint Finishes: Stick to flat matte blacks, bone whites, and rich antique bronzes to unify disparate upcycled materials.
- Prioritize Fire Safety: Never use real burning candles inside cardboard or paper projects; invest in reusable battery LED tea lights.
- Seal for Preservation: Spray finished paper and dough crafts with a clear matte aerosol sealer to protect against ambient autumn humidity.
Frequently Asked Questions
What is the best household glue for outdoor cardboard Halloween props?
Exterior-rated waterproof wood glue or hot glue sticks formulated for high-temp bonding hold securely against fluctuating autumn humidity and temperature drops.
How can you make homemade cardboard tombstones withstand outdoor rain?
Coat both sides of cardboard thoroughly in waterproof exterior latex house paint or spar urethane before spraying with textured stone finish.
What can you use instead of expensive store-bought spiderwebs?
Shred inexpensive polyester pillow batting or unroll heavy cotton quilt batting with fingers to create realistic, wind-resistant clinging webs.
How do you get genuine vintage aging on white paper and bandages?
Submerge paper or cotton fabric in a warm bath of steeped black tea and instant coffee granules for fifteen minutes, then let dry in the sun.
Can homemade salt dough ornaments survive outdoor front porch weather?
Salt dough absorbs atmospheric humidity rapidly; keep salt dough creations strictly indoors or within enclosed, weather-sealed glass lantern displays.
Final Editorial Verdict and Styling Recommendation
Homemade Halloween decor is far more rewarding than buying mass-produced decor off store shelves. With clever upcycling, simple tools, and cohesive color schemes, everyday household items transform into breathtaking seasonal showpieces.
Celebrate the joy of handmade artistry this autumn. By focusing on volume, rich distressing, and dramatic lighting, you will craft an unforgettable haunted sanctuary on zero budget.
Visit nashradecor for more details.